
User Manual - Out Of Stock Notification
- Installing the Magento 2 Out of Stock Notification extension
- Set up cron
- Uninstalling the Magento 2 Out of Stock Notification extension
- Extension Compatibility
- Introducing the Magento 2 Out of Stock Notification Extension
- Using the Magento 2 Out of Stock Notification Extension
Installing the Magento 2 Out of Stock Notification extension
Command Line Installation
- Backup your web directory and store database
- Download the Out of Stock Notification installation package
- Upload contents of the Out of Stock Notification installation package to your store root directory
- In SSH console of your server navigate to your store root folder:
cd path_to_the_store_root_folder |
run the following command: :
php bin/magento module:enable Aheadworks_OutOfStockNotification |
then:
php bin/magento setup:upgrade |
after:
php bin/magento setup:static-content:deploy -f |
5. Flush store cache; log out from the backend and log in again
|
Make sure the installation is done from the FTP administrator account. Otherwise, set 775 permissions to the store root directory after the extension is deployed. |
Composer Installation
If you are installing an extension from Aheadworks for the first time, you need to add our composer repository to your Magento store:
1. Login to your ssh console and navigate to your store folder:
cd path_to_the_store_root_folder |
Run the following command:
composer config repositories.aheadworks composer https://dist.aheadworks.com/ |
After the command was executed successfully, you can use the composer to install the extension.
To install the extension:
2. Login to your ssh console and navigate to your store folder:
cd path_to_the_store_root_folder |
3. Run the following command to install the latest version of the extension:
composer require aheadworks/module-out-of-stock-notification |
if you need to install a specific version, run this command:
composer require aheadworks/module-out-of-stock-notification:<version> |
|
Specify the version of the extension in <version> |
When prompted, enter Public Key (Username) and Private Key (Password):

Both Public Key (Username) and Private Key (Password) can be found in My Projects and Licenses in your personal account on our site:
 |
To upgrade the extension:
To update or upgrade an extension:
Download the updated extension file. Take note of the module-name and version. Export the contents to your Magento root.
If a composer package exists for the extension, run one of the following.
Update per module name:
composer update aheadworks/module-out-of-stock-notification |
Updater per version:
composer require aheadworks/module-out-of-stock-notification:<version> |
Run the following commands to upgrade, deploy, and clean the cache.
php bin/magento setup:upgrade --keep-generated |
Set up cron
If you have already configured cron jobs for your Magento installation then you can skip this step. Read the following instructions on setting cron job for your Magento store: Magento user guide.
Generally, it would be enough to run in SSH console of your server:
crontab -e |
And insert the following line:
*/3 * * * * php -c <ini-file-path> <your Magento install dir>/bin/magento cron:run |
Remember to confirm the Save request when exiting the installation.
Uninstalling the Magento 2 Out of Stock Notification extension
Since Magento introduced declarative Database you need to be very carefull when uninstalling or disabling the module.
|
NOTE: Please be very careful when uninstalling/disabling this module. This module uses a declarative DB scheme. Once the module is uninstalled the DB tables will be lost. |
Manual Removal
1. Disable the module by executing the following commands:
php bin/magento module:disable Aheadworks_OutOfStockNotification |
2. Remove the extension files from the following folder:
app/code/Aheadworks/OutOfStockNotification |
Automatic Removal (via Composer)
1. Disable the module by executing the following commands:
php bin/magento module:uninstall Aheadworks_OutOfStockNotification |
Extension Compatibility
| Module Version | Magento Version |
| As of version 1.0.0 | 2.4.6 - 2.4.8 |
The PHP version depends on your current Magento version. Please, refer to your Magento version release notes.
Introducing the Magento 2 Out of Stock Notification extension
Extension Overview
The Magento Out of Stock Notification extension helps merchants retain customer interest when products become unavailable. It allows shoppers to subscribe for back-in-stock alerts directly on product pages and automatically notifies them once items are restocked. Optionally, merchants can include discount coupons to encourage return visits and recover lost sales.
Key Features
-
Display out-of-stock subscription forms on product pages
-
Automatically notify customers when products are back in stock
-
Send optional discount coupons after restock
-
Support for inline and popup subscription forms
-
Product options selection in subscription forms
-
Customer self-management of subscriptions from My account page
Using the Magento 2 Out of Stock Notification extension
Extension Configuration
To enable the extension, go to Stores > Configuration > AHEADWORKS EXTENSIONS > Out of Stock Notification
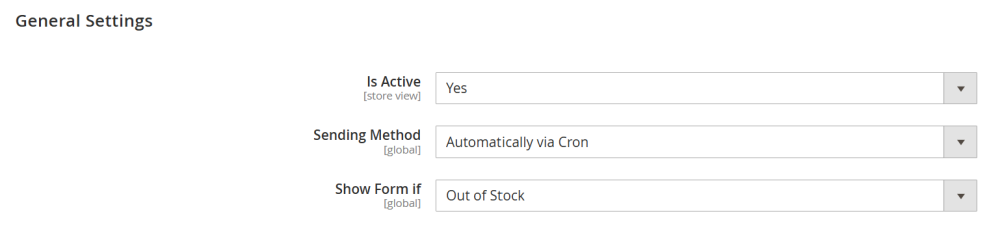
General Settings
In the General Settings section configure the core behavior of the extension:
-
Is Active – set this option to Yes to enable the extension;
-
Sending Method – define how back-in-stock notifications are sent:
-
Automatic via Cron – notifications are sent automatically using Magento cron jobs. Make sure cron is properly configured and running on your server;
-
Manually – notifications are sent manually from Catalog > Out of Stock Notification by Aheadworks > Manage Subscriptions. This option is useful for testing and controlled sending.
-
Show Form If – define when the out-of-stock subscription form should appear on the product page:
-
Out of stock –when the product Stock Status is set to Out of Stock in admin;
-
Qty is 0 – when product quantity reaches zero, even if stock status remains In Stock;
-
Out of stock or Qty is 0 – when either of the above conditions is met;
-
Salable Qty is 0 – when salable quantity is zero, even if stock status and quantity indicate availability.
Form Settings
This section controls how the subscription form is displayed on product pages:
-
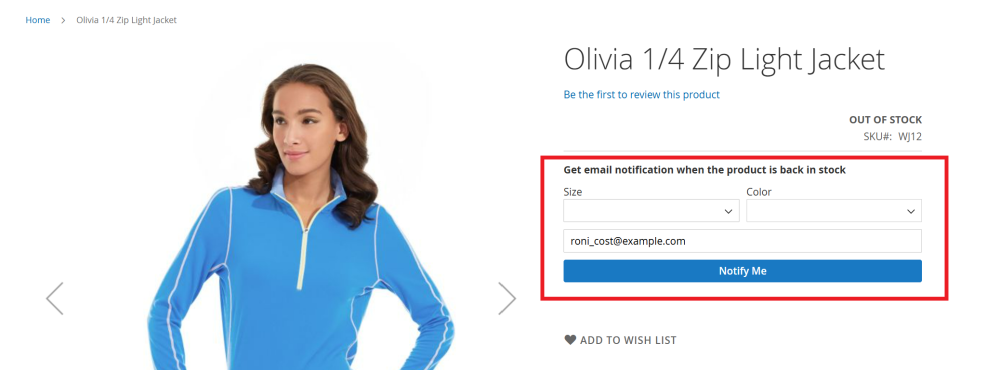
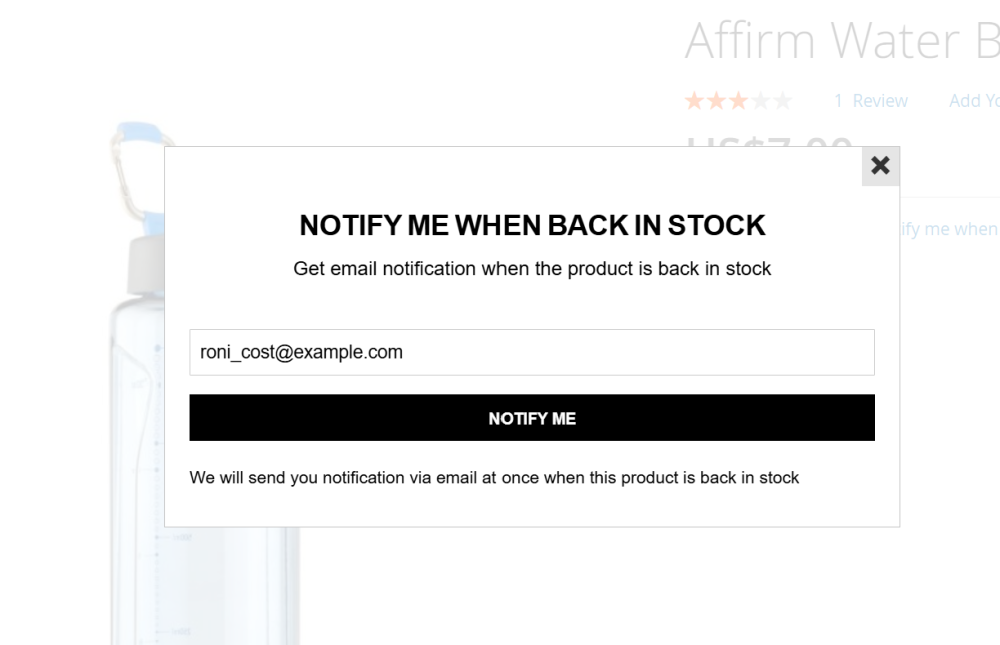
Form Type – choose how the subscription form appears:
-
Simple Form (inline) – displayed directly on the product page;
-
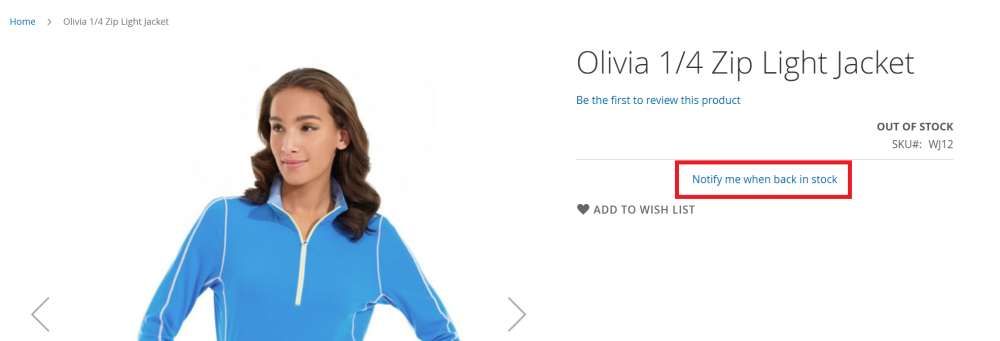
- Popup – displayed in a popup window after the customer clicks a text link.

-
Hide Form After Subscription – if enabled, the form is hidden after a customer subscribes, preventing duplicate subscriptions for the same product.
If Popup is selected, additional options become available:
-
Active Overlay – enables a background overlay for popup forms. Clicking outside the popup will close it;
-
Auto Close – automatically closes the popup after a successful subscription;
-
Auto Close Delay – define the delay (in milliseconds) before the popup closes when auto-close is enabled.

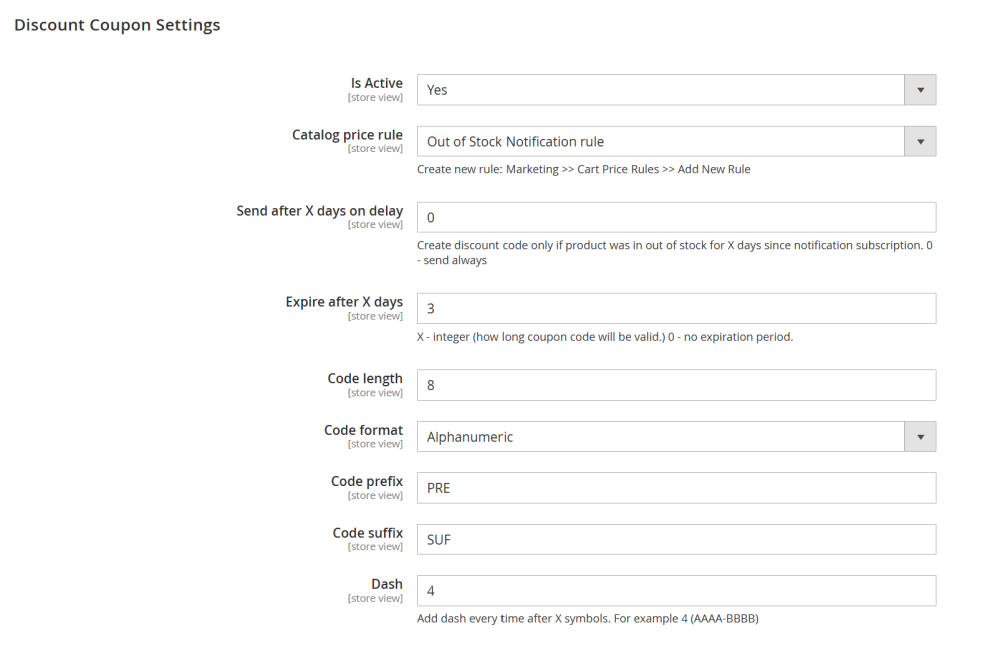
Discount coupon settings
This section allows you to configure optional discount coupons sent to customers after waiting for a product to be restocked:
-
Is Active – set this option to Yes to enable the discount coupon feature;
-
Cart price rule - select the cart price rule that will be applied to the generated discount coupon.
| Note: To create new rule, please go to: Marketing > Cart Price Rules > Add New Rule |
-
Send After X Days on Delay – specify how many days the product must remain out of stock before a coupon is included in the notification email (e.g. if here is set 5 days, then if back in stock notification will be send after 5 days since subscription it has discount coupon code);
-
Expire after X days – set how long (in days) the coupon will remain valid (Set to 0 to make the coupon never expire);
-
Code length – set the number of characters in the generated coupon code (without prefix, suffix and dashes);
-
Code format – set the format of the coupon code:
-
Alphanumeric;
-
Alphabetical;
-
Numeric;
-
Code prefix – set the text to be added at the beginning of the coupon code;
-
Code suffix – set the text to be added at the end of the coupon code;
-
Dash – specify how often a dash should be inserted into the coupon code (e.g, setting 4 results in a format like AAAA-BBBB);
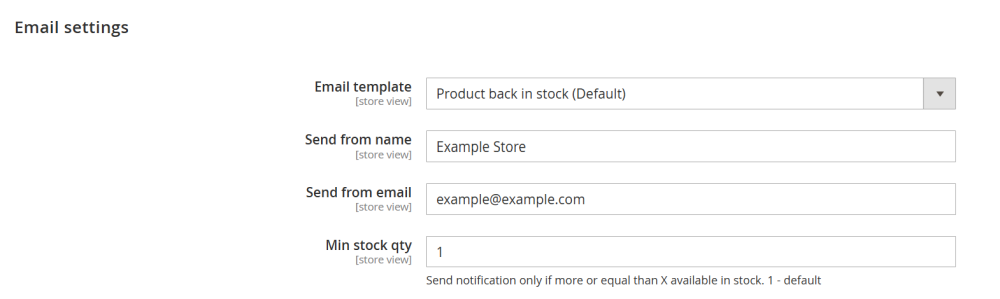
Email settings
Configure the email sender and template used for back in stock notifications:
-
Email Template – select the email template used to send notification when a product is back in stock.
-
Send from Name – set the name displayed as the email sender;
-
Send from Email – set the sender email address;
-
Min Stock Qty – set the minimum available stock required before sending notifications, helping prevent immediate sell-outs. The default value is 1 (1 item)
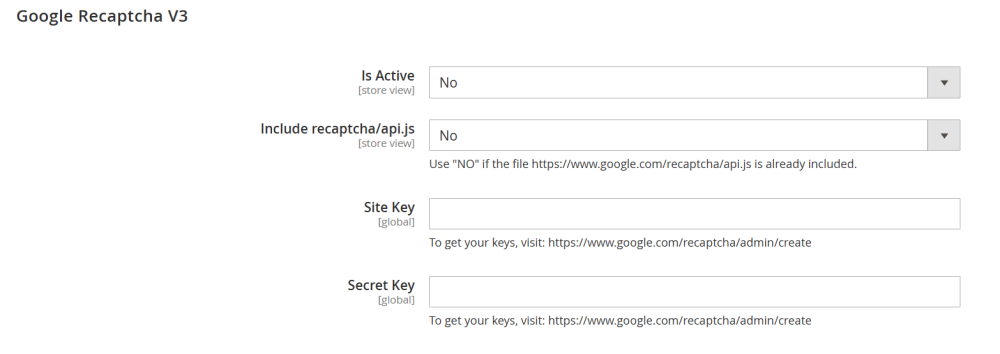
Google Recaptcha V3
Protect subscription forms from spam and automated submissions:
-
Is Active – set this option to Yes to enable the feature;
-
Include recaptcha/api.js – set to Yes to automatically load the Google reCAPTCHA JavaScript library (https://www.google.com/recaptcha/api.js) on the frontend. Set to No if this file is already included by your theme or another extension to avoid duplicate loading;
-
Site Key – enter your public reCAPTCHA v3 site key provided by Google. This key is used on the frontend to initialize reCAPTCHA for visitors;
-
Secret Key – enter your private reCAPTCHA v3 secret key provided by Google. This key is used on the backend to verify reCAPTCHA responses with Google’s servers.
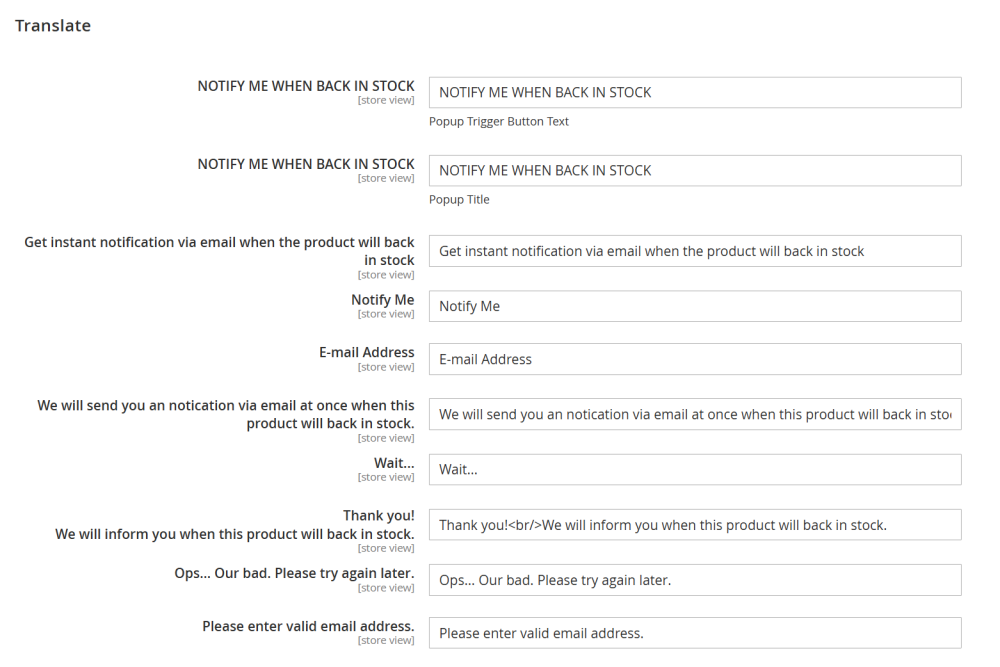
Translation
This section allows you to customize and translate all texts used in the notification subscription forms.
HTML is allowed, you can use basic HTML tags such as <br>, <span>, or <b> for formatting.
| Note: Switch the Store View to manage translations for different languages. |
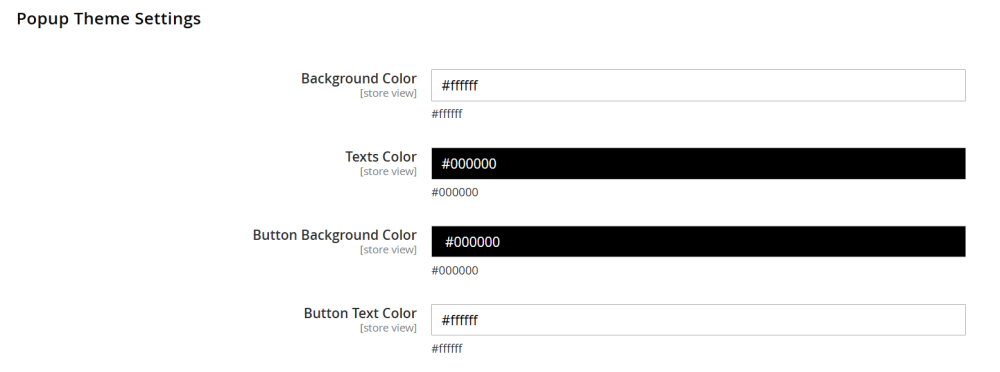
Popup Theme Settings
This section allows you to customize popup colors to match your store brandings.
Creating Notification Email Templates
The Notification email templates can be customized using Magento’s default email template editor.
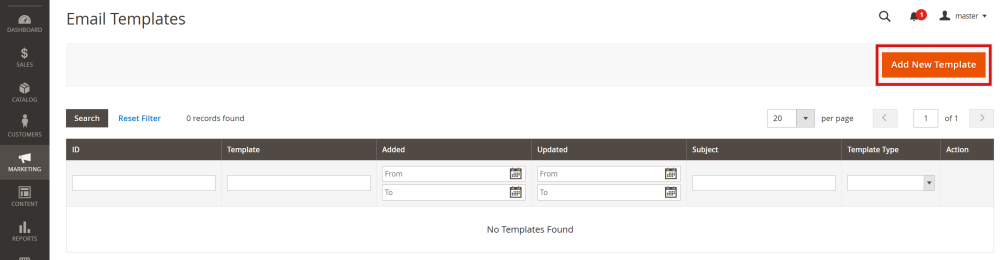
To customize a template, go to Marketing > Communications > Email Templates, and click the Add New Template button
On the opened New Template page, go to the Load Default Template section. In the Template dropdown menu, locate Aheadworks_OutOfStockNotification section with the Product back in stock template
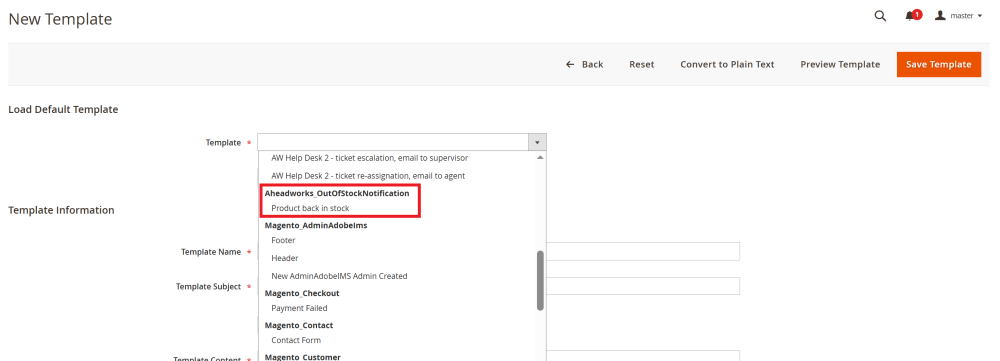
Select the required template and click the Load Template button.

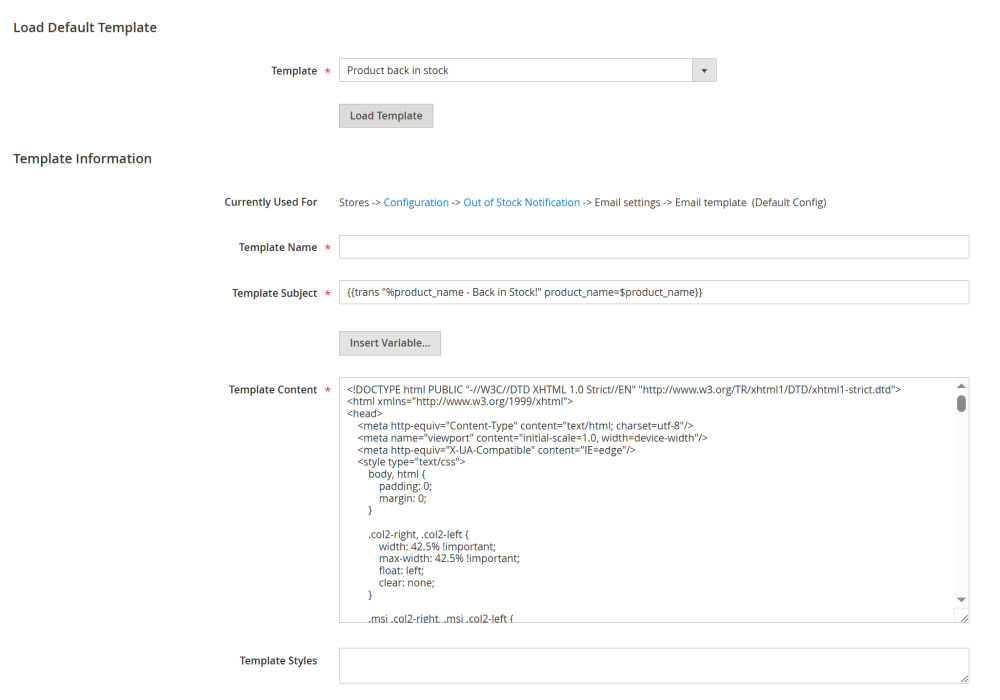
The selected template will automatically load its predefined content, which can then be customized as needed.
In the Template Information section there are the following field:
-
Currently Used For – this field shows where the template is currently assigned in the system. This helps admins understand the impact of changes made to the template;
-
Template Name – set an internal name for the template, that will be displayed in the Email Templates table and is used when selecting templates in configuration settings;
-
Template Subject – set the subject line of the email that customers will see in their inbox;
-
Template Content – this field contains the pre-built HTML and variables used to generate the email content. Customize the text, structure, and styling to your needs (but it is recommended to keep the coupon variables to ensure correct functionality);
-
Template Styles – optional field for adding custom CSS styles to control the appearance of the email.
Managing Notification Emails
All submitted back-in-stock subscription requests are stored in the Magento admin panel.
To view and manage them, go to Catalog > Out of Stock Notification by Aheadworks > Manage Subscriptions.
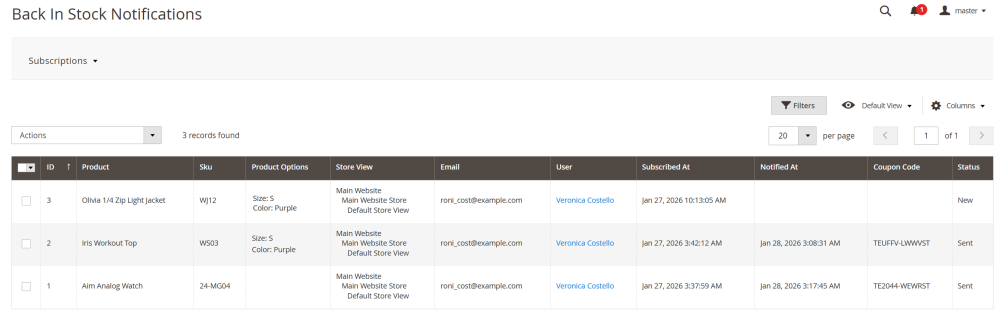
This opens the Back In Stock Notifications table, where store admins can track customer interest, notification status, and coupon usage. The table includes the following columns:
-
ID – unique internal identifier for the subscription;
-
Product –product subscribed for back-in-stock notification;
-
SKU – SKU of the subscribed product;
-
Product Options – selected product options (such as size or color), if applicable;
-
Store View – store view where the subscription was submitted;
-
Email – email address that will receive the back-in-stock notification;
-
User – customer account associated with the subscription (if the customer was logged in)
-
Subscribed At – date and time when the customer subscribed to the back-in-stock notification;
-
Notified At – date and time when the notification email was sent;
-
Coupon Code – automatically generated discount coupon code, if the coupon feature is enabled
-
Status – current subscription status:
-
Sent – notification email sent;
-
New – subscription submitted;
-
Pending – the item is back in stock and the email notification is waiting to be sent (appears only if Sending Method is set to Manually)
-
Canceled – subscription canceled by the admin.
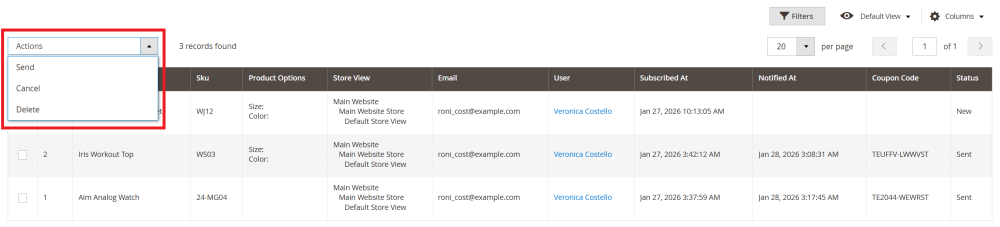
If Sending Method is set to Manually, the Actions dropdown becomes available:
- Send – send required back in stock notification subscription to the customer;
- Cancel – cancel selected subscription(s);
- Delete – delete selected subscription(s) from the table.
Sending Notification Emails Manually
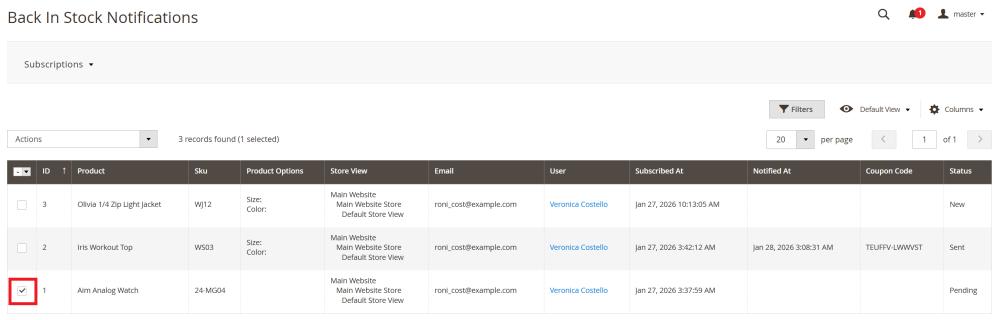
Once the item is back in stock, go to Catalog > Out of Stock Notification by Aheadworks > Manage Subscriptions.
On the Back In Stock Notifications page, locate the required subscription in the table and select it.
In the Status column, you will see the Pending status. This indicates that the product is already back in stock and the notification email is waiting to be sent.
Select the required subscription.
After selecting the required subscription, choose Send from the Actions dropdown menu and confirm the action in the popup.
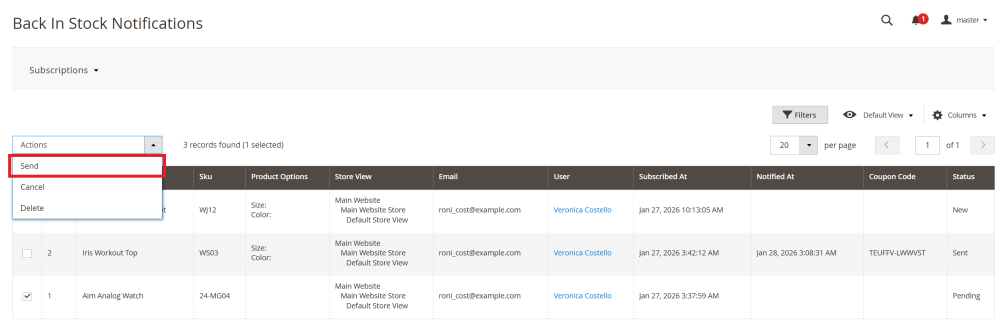
Once the notification is sent, the table will be updated automatically:
-
the Notified At column will display the date and time the email was sent;
-
the Coupon Code column will show the generated coupon code, if this feature is enabled;
-
the subscription status will change to Sent.

| Note: If the product is still out of stock and you click Send, the system will not send the email to prevent false notifications. In this case, the status remains New. |
Back in Stock Notifications on the Storefront
Back In Stock Notification Subscriptions
The customers can monitor and control their back in stock notification subscriptions.
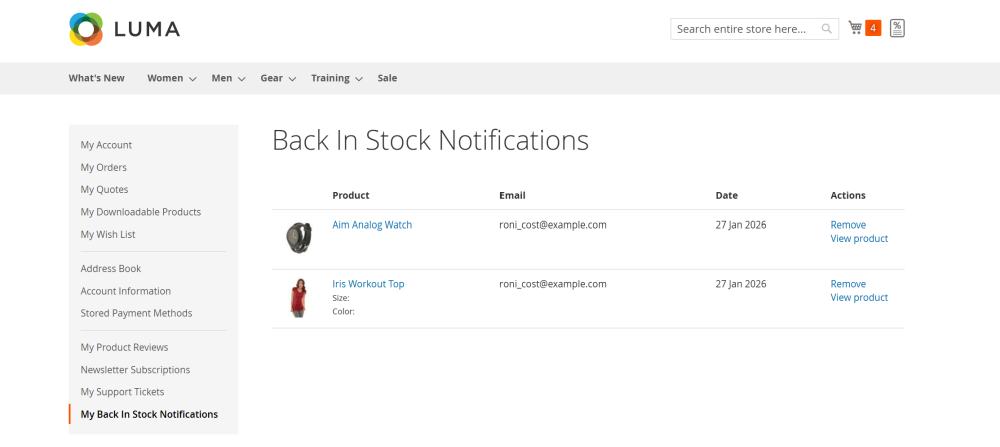
To access these subscriptions go to My Account > My Back In Stock Notifications.
On the Back In Stock Notifications page, customers will see a table with all products they subscribed to for restock notification. The table includes the following information:
-
Product – the product name and image the customer subscribed to;
-
Email – the email address the notification will be sent to;
-
Date – the date when subscription form was submitted;
-
Actions – available actions for each subscription:
-
Remove – removes the product from the subscription list and stops future notification;
-
View product – opens the product’s detail page.
A product subscription will be removed from the table in the following cases:
-
the back-in-stock notification has been successfully sent to the customer;
-
the customer manually removes the product from their subscriptions;
-
the subscription is canceled by an admin in the Magento backend;
-
the subscription is deleted by an admin in the Magento backend.
Subscription Forms
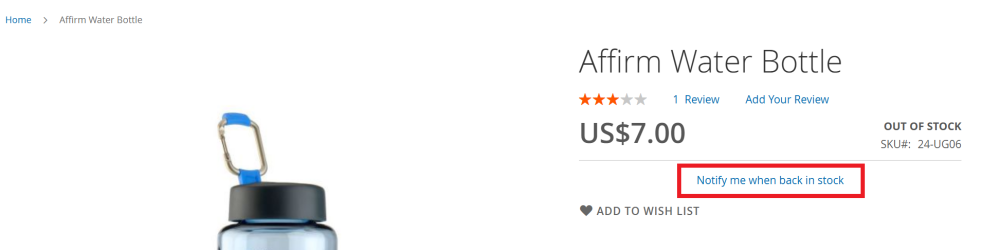
Depending on configuration, one of the following subscription forms is displayed:
| Note: for logged-in customers, the email field is automatically filled in to speed up subscription. |
-
Simple Subscription Form (Inline) – full subscription form displayed directly on the product page;
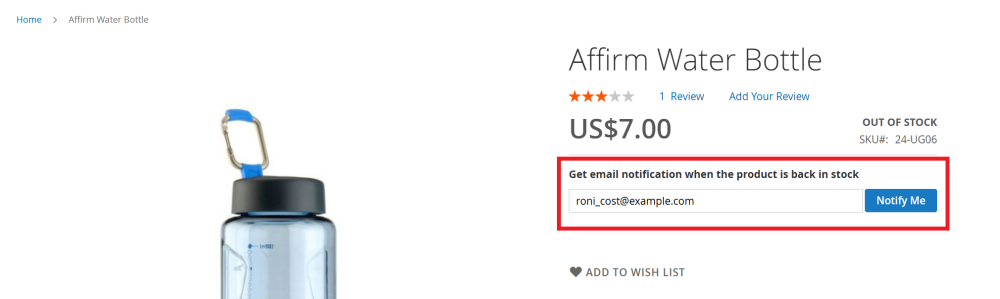
- Popup Subscription Form – full subscription form displayed via popup triggered by a text link on the product page.
If the product has configurable options, the subscription form allows customers to select the specific configuration they want to receive back-in-stock notifications for.