
User Manual - PDF Invoice
- Installing the Magento 2 PDF Invoice extension
- Set up cron
- Uninstalling the Magento 2 PDF Invoice extension
- Extension Compatibility
- Introducing the Magento 2 PDF Invoiceextension
- Using the Magento 2 PDF Invoice extension
Installing the Magento 2 PDF Invoice extension
Command Line Installation
- Backup your web directory and store database
- Download the PDF Invoice installation package
- Upload contents of the PDF Invoice installation package to your store root directory
- In SSH console of your server navigate to your store root folder:
cd path_to_the_store_root_folder |
run the following command: :
php bin/magento module:enable Aheadworks_PdfTemplates |
then:
php bin/magento setup:upgrade |
after:
php bin/magento setup:static-content:deploy -f |
5. Flush store cache; log out from the backend and log in again
|
Make sure the installation is done from the FTP administrator account. Otherwise, set 775 permissions to the store root directory after the extension is deployed. |
Composer Installation
If you are installing an extension from Aheadworks for the first time, you need to add our composer repository to your Magento store:
1. Login to your ssh console and navigate to your store folder:
cd path_to_the_store_root_folder |
Run the following command:
composer config repositories.aheadworks composer https://dist.aheadworks.com/ |
After the command was executed successfully, you can use the composer to install the extension.
To install the extension:
2. Login to your ssh console and navigate to your store folder:
cd path_to_the_store_root_folder |
3. Run the following command to install the latest version of the extension:
composer require aheadworks/module-pdf-templates |
if you need to install a specific version, run this command:
composer require aheadworks/module-pdf-templates:<version> |
|
Specify the version of the extension in <version> |
When prompted, enter Public Key (Username) and Private Key (Password):

Both Public Key (Username) and Private Key (Password) can be found in My Projects and Licenses in your personal account on our site:
 |
To upgrade the extension:
To update or upgrade an extension:
Download the updated extension file. Take note of the module-name and version. Export the contents to your Magento root.
If a composer package exists for the extension, run one of the following.
Update per module name:
composer update aheadworks/module-pdf-templates |
Updater per version:
composer require aheadworks/module-pdf-templates:<version> |
Run the following commands to upgrade, deploy, and clean the cache.
php bin/magento setup:upgrade --keep-generated |
Set up cron
If you have already configured cron jobs for your Magento installation then you can skip this step. Read the following instructions on setting cron job for your Magento store: Magento user guide.
Generally, it would be enough to run in SSH console of your server:
crontab -e |
And insert the following line:
*/3 * * * * php -c <ini-file-path> <your Magento install dir>/bin/magento cron:run |
Remember to confirm the Save request when exiting the installation.
Uninstalling the Magento 2 PDF Invoice extension
Since Magento introduced declarative Database you need to be very carefull when uninstalling or disabling the module.
|
NOTE: Please be very careful when uninstalling/disabling this module. This module uses a declarative DB scheme. Once the module is uninstalled the DB tables will be lost. |
Manual Removal
1. Disable the module by executing the following commands:
php bin/magento module:disable Aheadworks_PdfTemplates |
2. Remove the extension files from the following folder:
app/code/Aheadworks/PdfTemplates |
Automatic Removal (via Composer)
1. Disable the module by executing the following commands:
php bin/magento module:uninstall Aheadworks_PdfTemplates |
Extension Compatibility
| Module Version | Magento Version |
| As of version 1.0.0 | 2.4.6 - 2.4.8 |
The PHP version depends on your current Magento version. Please, refer to your Magento version release notes.
Introducing the Magento 2 PDF Invoice extension
Extension Overview
The Magento 2 PDF Invoice extension enables you to generate fully customizable PDF documents for all key sales entities: Order, Invoice, Shipment, and Credit Memo.
With a powerful visual editor and flexible configuration options, you can design professional PDF templates that reflect your brand identity and meet your operational requirements.
Key Features
- Custom PDF templates using a drag-and-drop visual builder
- Use 4 pre-built designs (including RTL versions) or create a template from scratch
- Dynamic variables support (order, customer, payment, totals, shipping, etc.)
- Conditional template assignment based on Customer Group and Shipping Method
- Tax display and totals presentation config
- Option to add additional pages to main document
- Frontend PDF downloads support
- Support multiple PDF rendering processors
Using the Magento 2 PDF Invoice extension
Creating PDF Templates
Before configuring how templates are applied, you need to create the required PDF templates.
There are 4 document types:
-
Order
-
Invoice
-
Shipment
-
Credit Memo
These document types are already prebuilt in the system; you only need to select a design and load a template based on it.
To load a new PDF Template go to Sales > Operations > PDF Templates.
On the PDF Templates page, select the document type from the Create New Template dropdown.
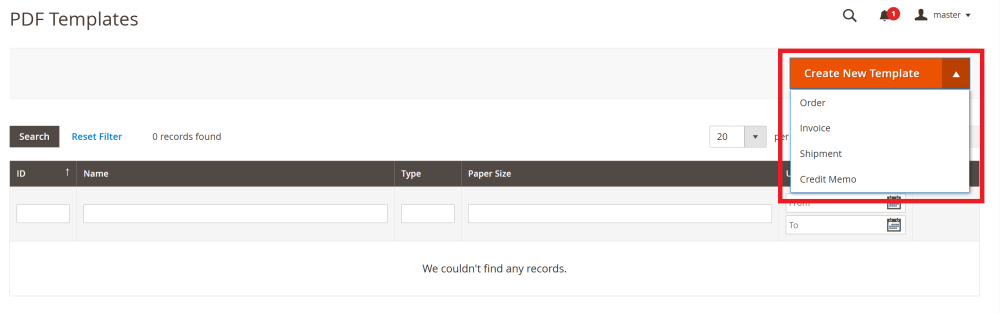
In the popup window define:
-
Template Name – internal name used in configuration;
-
Paper Size – defines document format (e.g., A4);
-
Pre-built PDF Design – available designs depend on paper size;
There are 4 prebuilt designs and their RTL variants. You may also select the empty option to create a fully customized template.
Click Create New
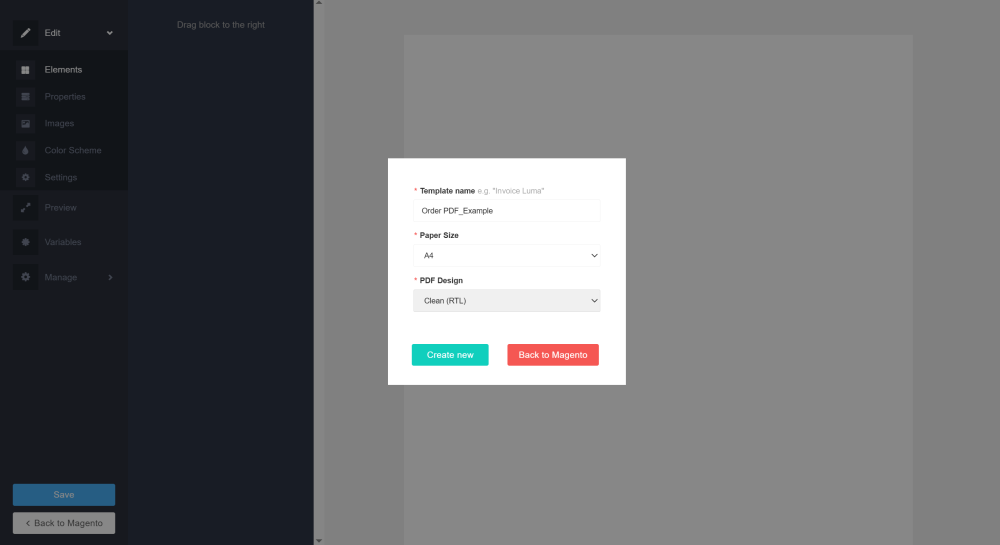
After clicking, the visual editor opens.
| The template is created. You may continue editing it or click Back to Magento and configure how the PDF documents are used in the extension configuration in the Stores > Configuration > AHEADWORKS EXTENSIONS > PDF Templates |
The template is pre-filled with dummy data (unless you selected the empty option) to help you better understand the layout structure and positioning of elements.
You can further customize the template using the editor with the following abilities:
Edit
The Edit section allows you to modify the layout and content of the template:
-
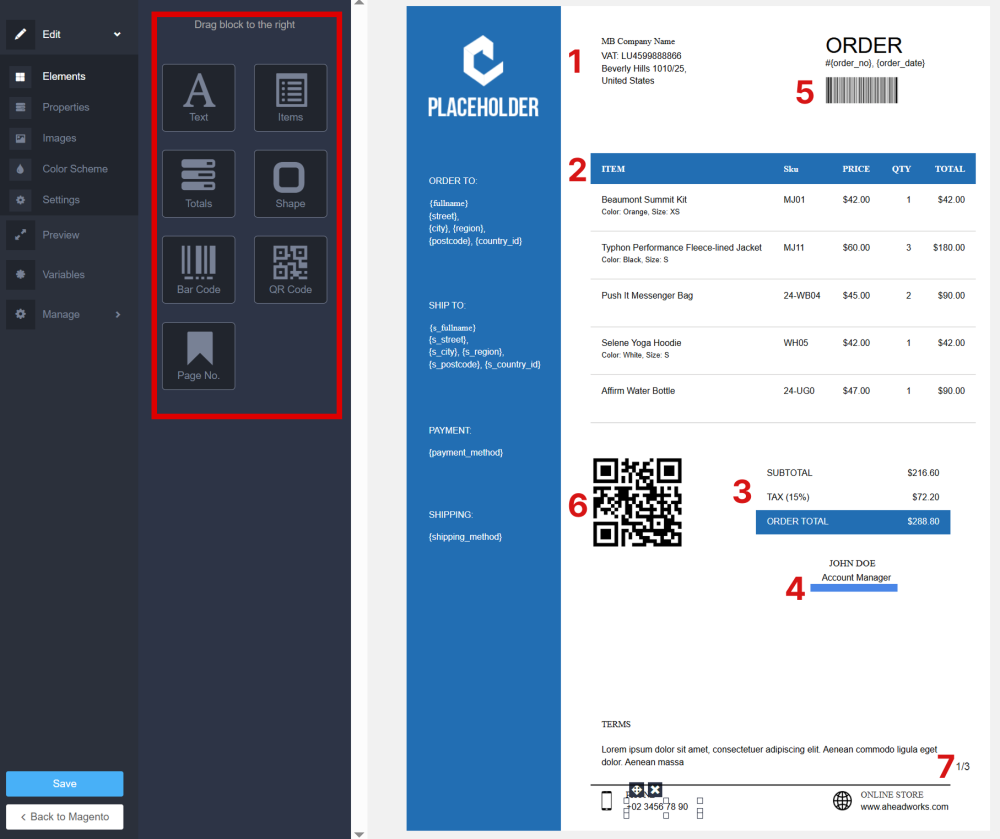
Elements – add new components to the template:
-
-
Text – custom text block (static or dynamic content);
-
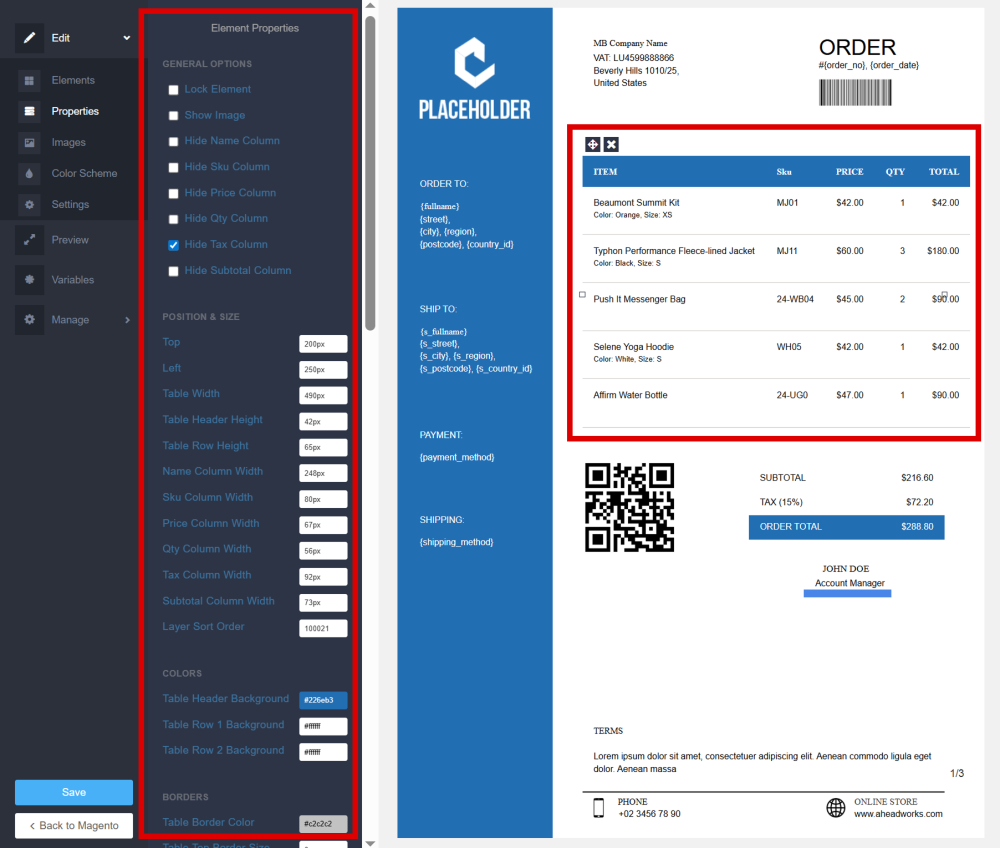
Items – purchased product table including Image, Name, SKU, Price, Qty, Tax, Subtotal (columns can be shown/hidden);
-
Totals – a block displaying Subtotal, Tax, and Order Total info;
-
Shape – adjustable rectangle element for layout styling;
-
Bar Code – insert the barcode (e.g., for order number);
-
QR Code – insert scannable QR code (e.g. for the website);
-
Page No. – displays page numbering (should be edited manually).
-
|
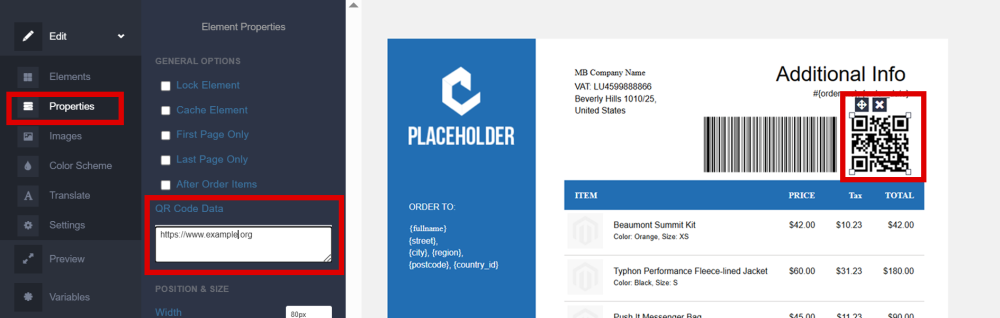
Note: In order for the Bar Code or QR Code to be visible in the downloaded PDF, the appropriate value must be entered in the corresponding QR/Bar Code Data field within the Properties section.
|
-
Properties – element settings that allow you to further customize the selected template content.
When selecting an element, its configurable properties appear (font, alignment, size, borders, spacing, etc.).
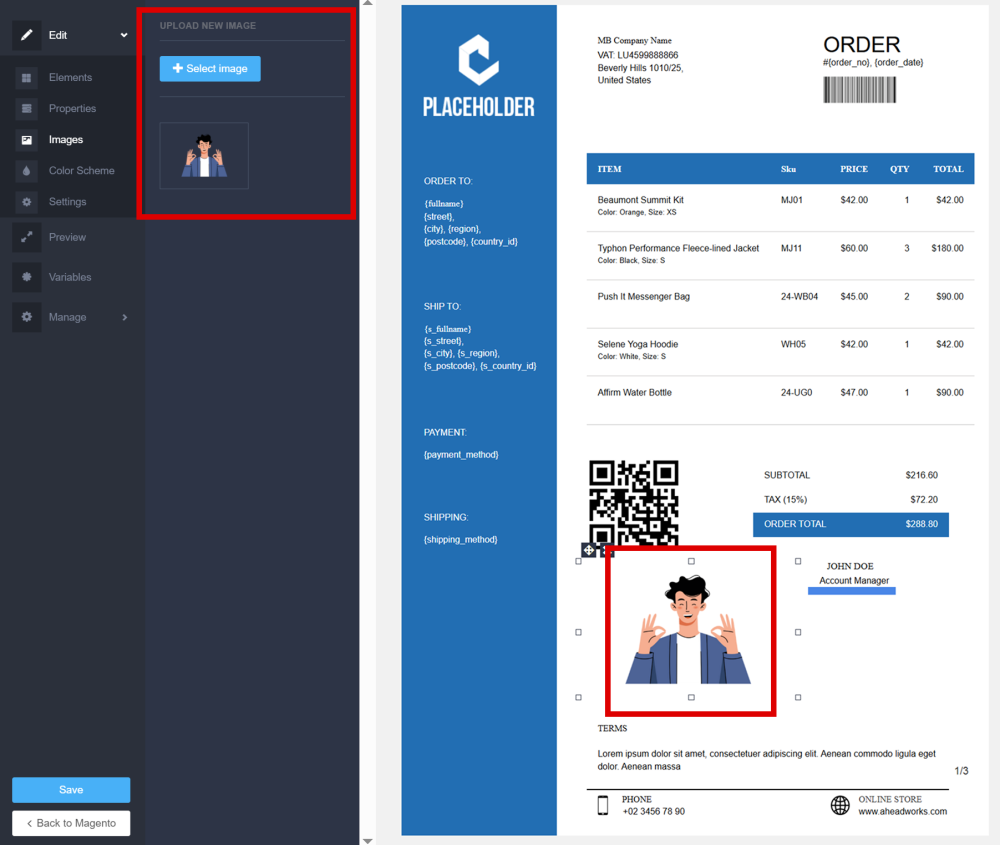
- Images – upload and insert custom images such as logos or signatures;
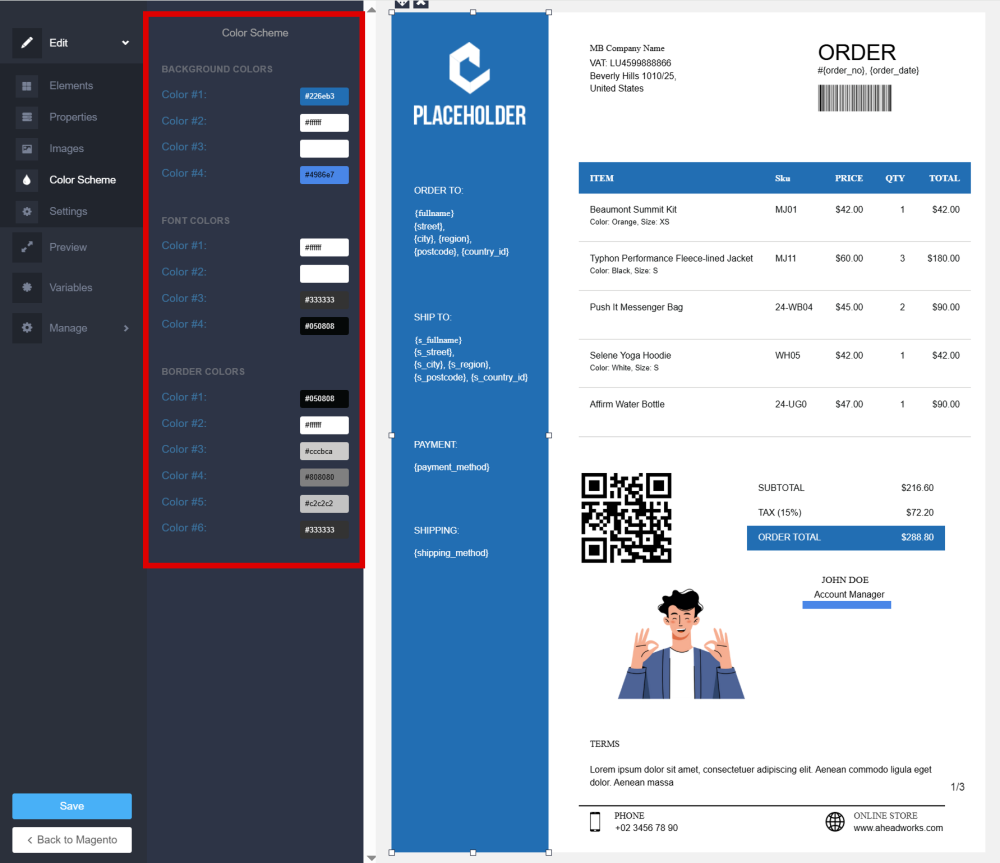
- Color Scheme – Adjust template main color scheme, including background, font, and border colors;
-
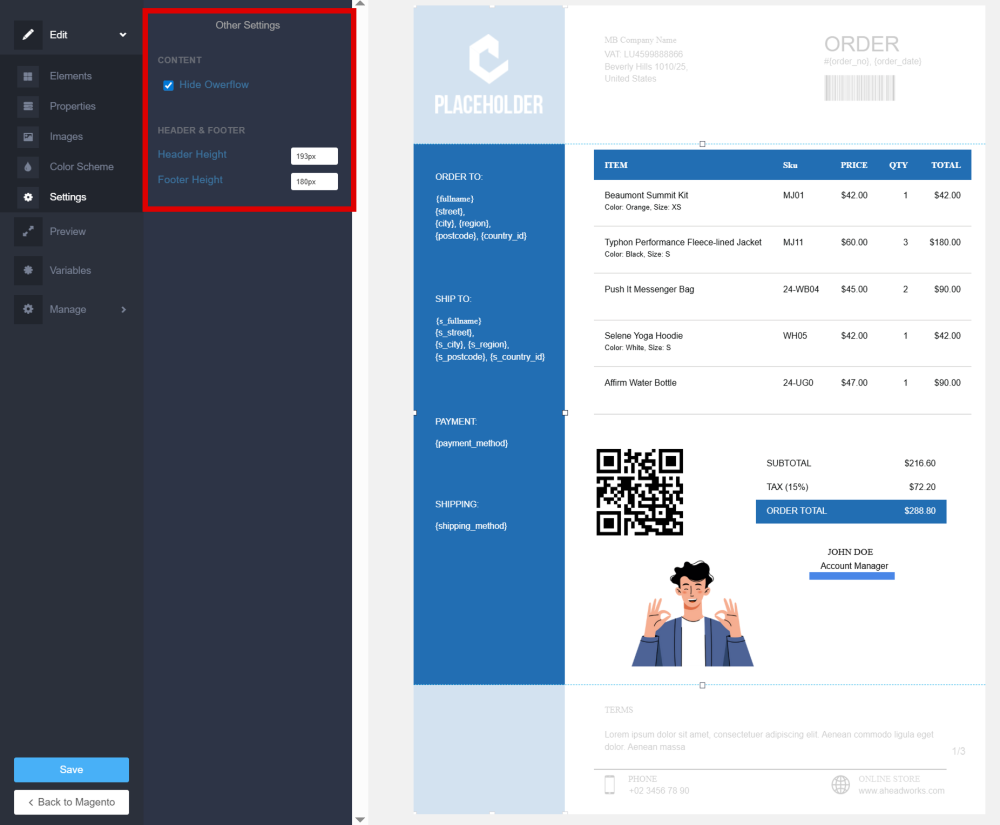
Settings – Configure additional template parameters.
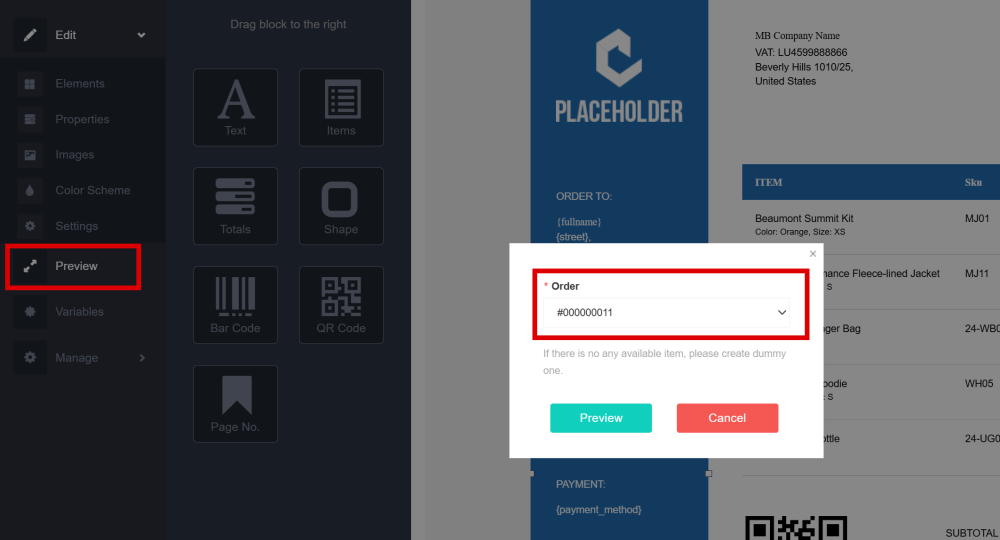
Preview
The Preview section allows you to test how the template looks with real order data.
Click Preview in the side bar menu. In the opened popup, select an existing order from the Order dropdown field, and click the Preview button.
The PDF file will be generated and automatically downloaded to your computer for review.
| Note: If no orders are available, create a test (dummy) order in Magento to see the Variable List. |
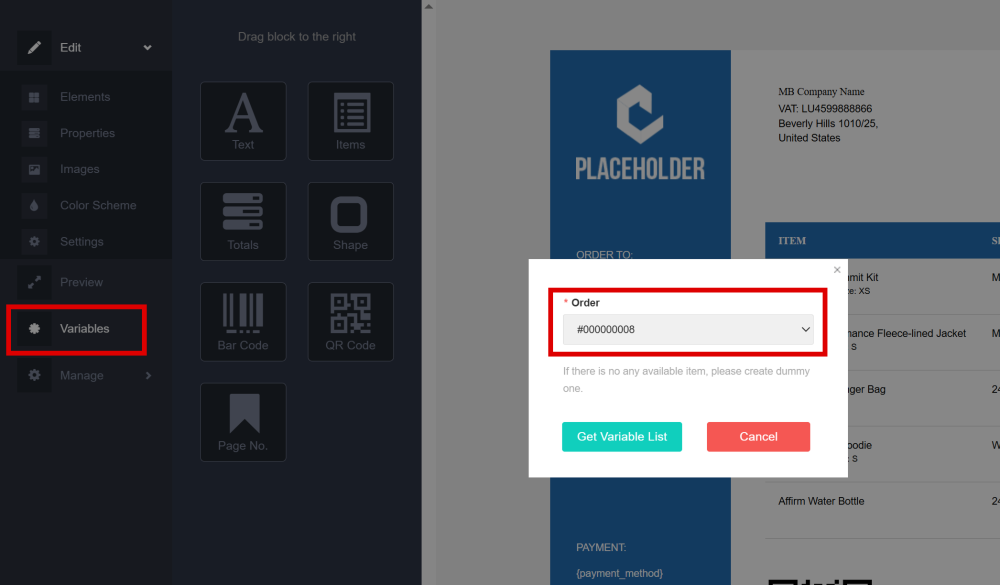
Variables
The variables allow you to insert dynamic data (order, customer, payment, totals, etc.) into your PDF template.
To view the available Variables List click the Variable in the side bar menu. In the opened popup, select the existing order, and click Get Variable List to load all available variables.
| Note: If no orders are available, create a test (dummy) order in Magento to view the Variable List. |
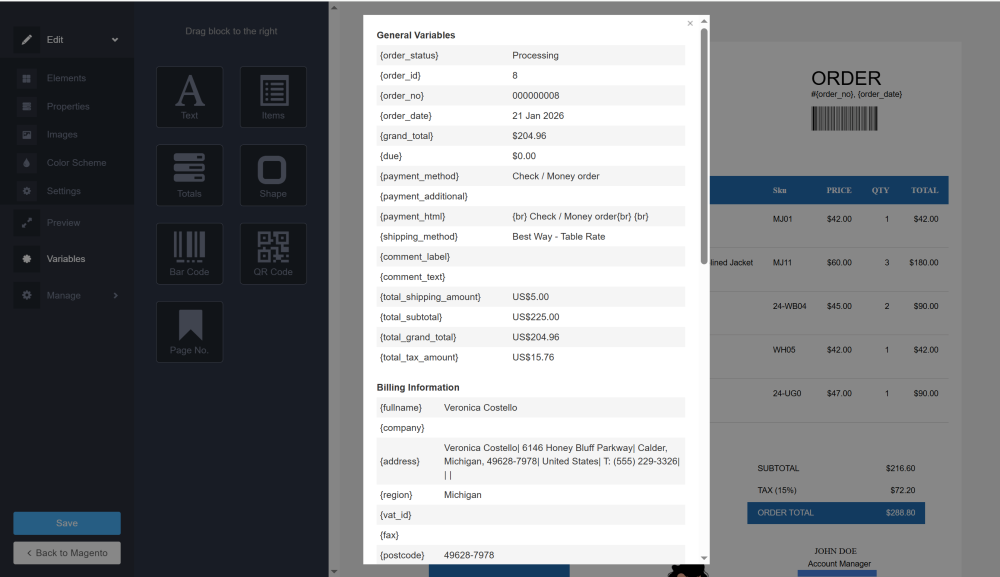
After that, a popup window appears displaying all available variables grouped by sections.
Each variable consists of:
-
Variable code (e.g. {order_no})
-
Preview value (based on the selected order)
To use a variable, copy its code and paste it into a Text block inside the template and adjust font, size, alignment, and styling as needed.
When the PDF is generated, the variable will be replaced with actual order data.
Manage
The Manage section provides additional template management options.
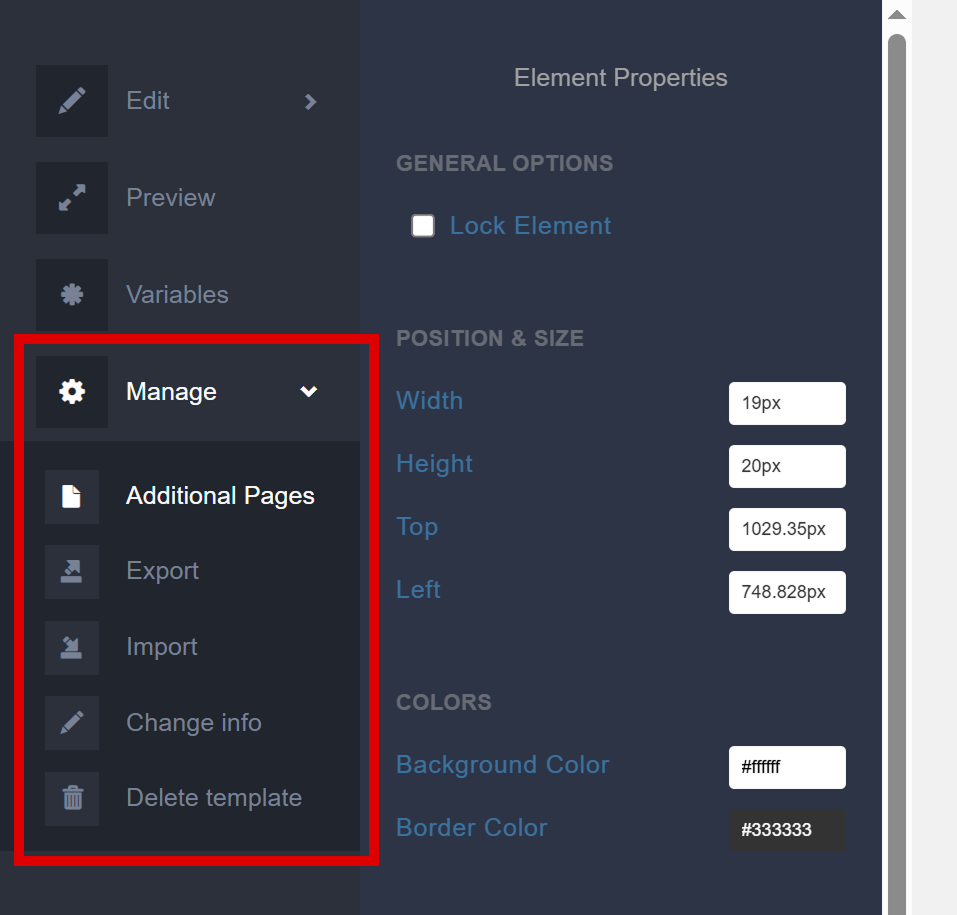
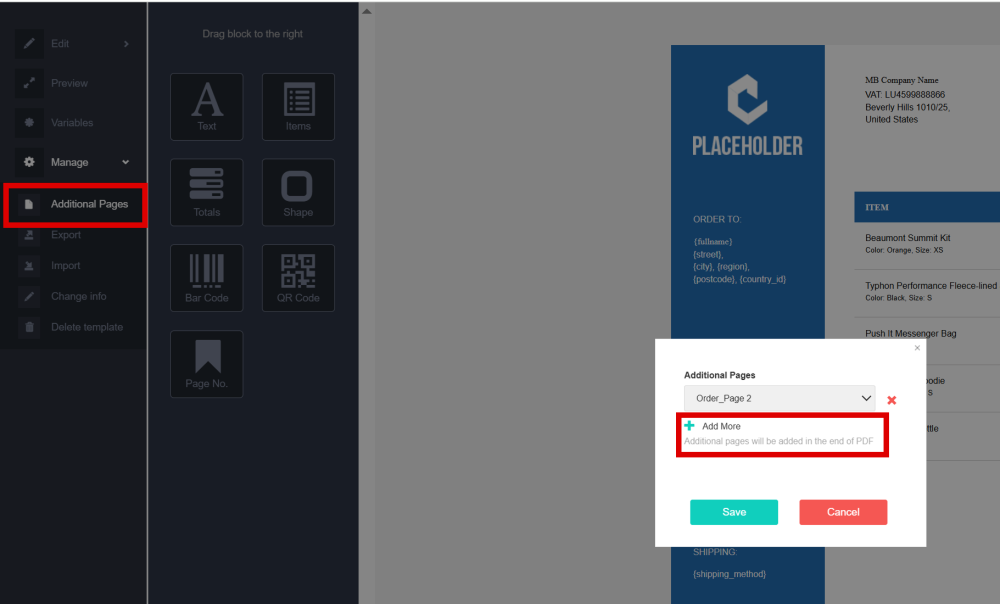
Additional Pages
The Additional Pages section allows you to add extra PDF pages to the end of the main document.
Navigate to Manage > Additional Pages. In the opened Additional Pages popup window you can define which extra templates will be added to the PDF.
Click Add More to add another page.
Selected templates will be displayed in this popup. You can replace one template with another, or delete these additional pages from the list.
| Note: Only templates of the same document type can be added as Additional Pages (for example, for an Order PDF you can only add other Order-type templates; only those will appear in the dropdown list) |
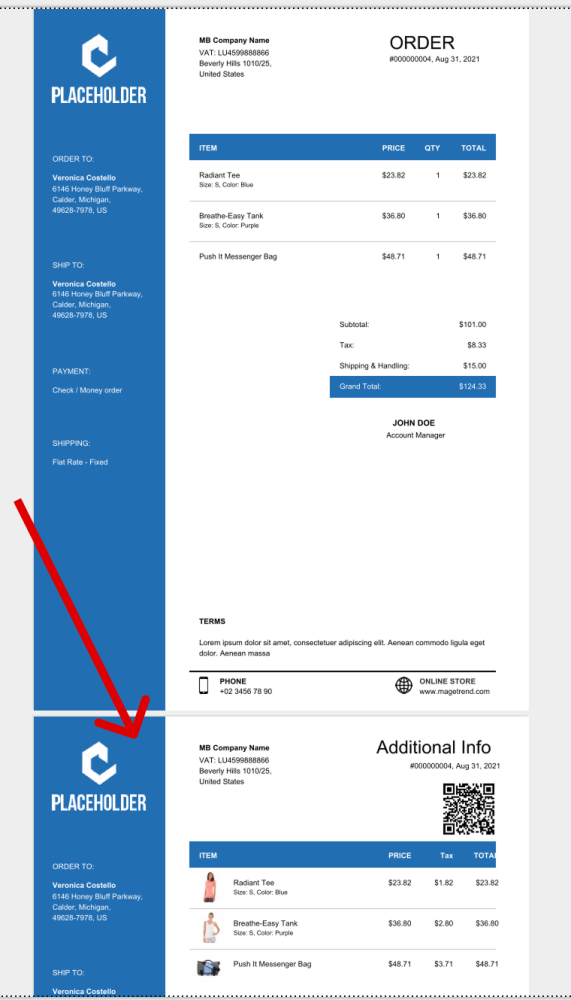
All selected additional pages will be added to the end of the generated PDF document in the same order as listed.
These additional pages are not visible within the main template editor workspace, but you can review them using the Preview option.
Export
In the Export section, , you can download the template design in .XML format for backup or transfer purposes.
Navigate to Manage > Export. In the Export popup window, define the name of the design and click the Export button.
The design file will be downloaded in the .xml format.

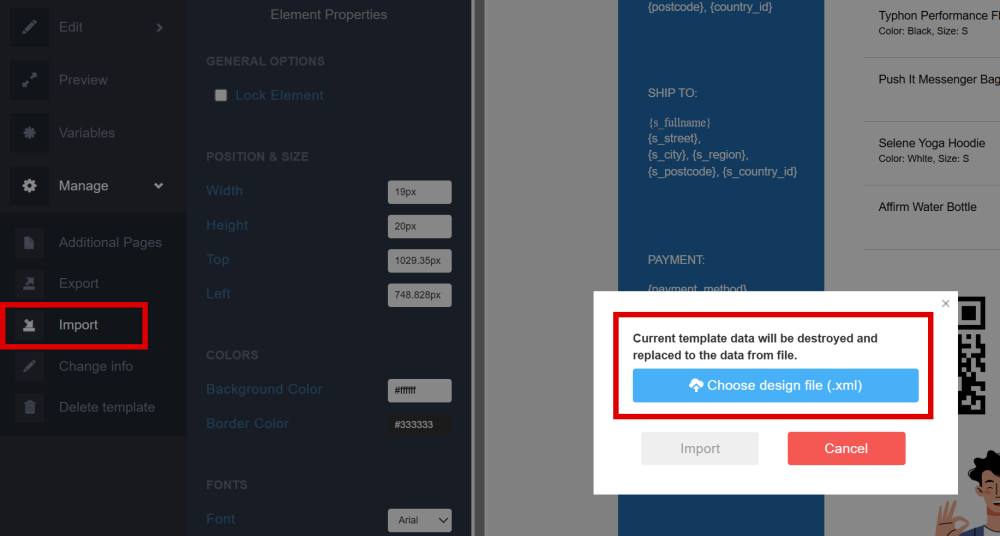
Import
If you have a ready-made template design, you can import it into the editor and continue editing it.
Navigate to Manage > Import. In the Import popup window, click Choose design file (.xml) button and select the file from your computer. Click the Import button.
Current template data will be permanently overwritten and replaced with the data from the imported file.
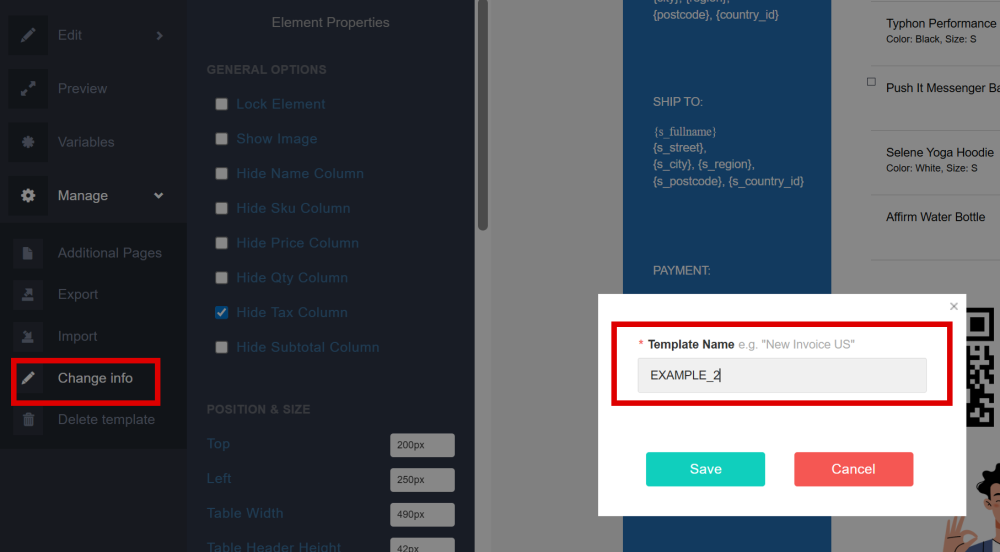
Change Info
The name of the template can be changed in Manage > Change info. In the Change info popup window, enter the new template name and click the Save button.
The template name will be updated accordingly.
Delete Template
The current template can be deleted in Manage > Delete template. In the Delete popup window, confirm your action to permanently remove the template.

Extension Configuration
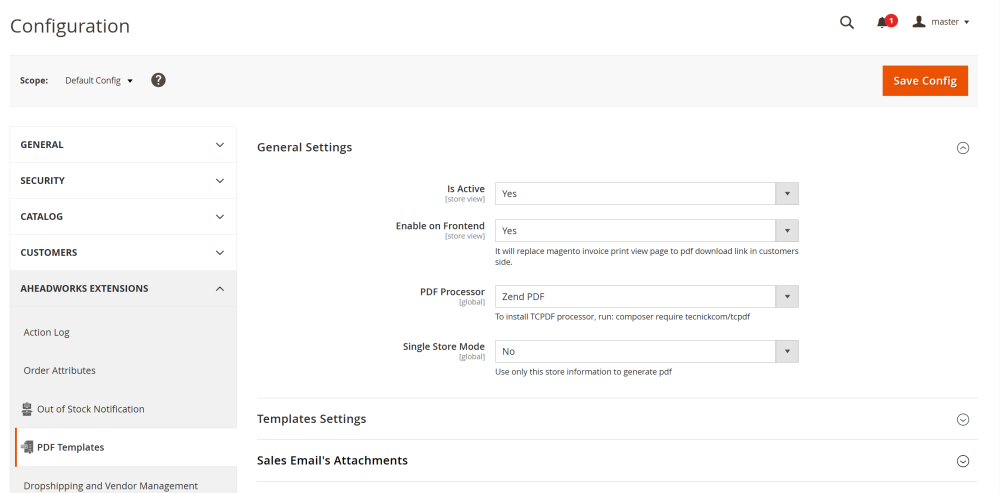
To enable the extension, go to Stores > Configuration > AHEADWORKS EXTENSIONS > PDF Templatesf
General Settings
In the General Settings section configure the core behavior of the extension:
-
Is Active – set option to Yes to enable the extension;
-
Enable on Frontend – set to Yes to replace the default Magento invoice print view page with a PDF download link on the customer account page;
-
PDF Processor – select the PDF rendering engine used to generate PDF documents. Available options depend on installed libraries.
| Note: To use the TCPDF processor, install it via composer by running composer require tecnickcom/tcpdf |
-
Single Store Mode – define how store information is applied when generating PDF documents:
-
No – use the standard store configuration based on the document contex;
-
Yes – use only the selected store information to generate PDF documents.
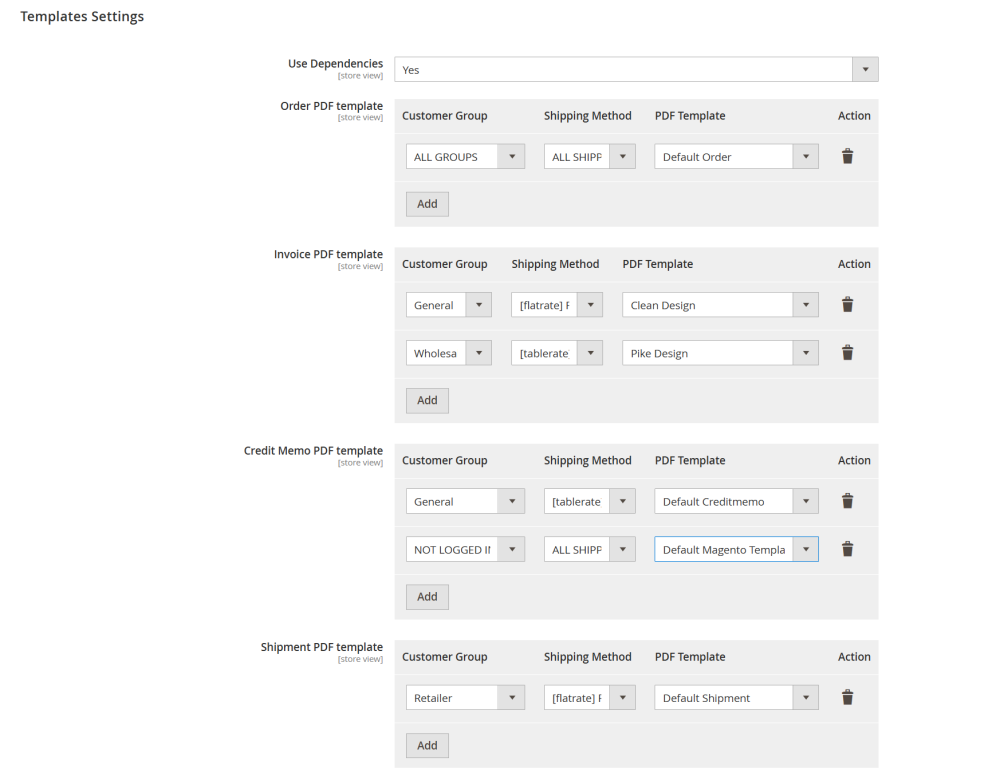
Templates Settings
The Templates Settings section defines which PDF template is applied to each document type.
-
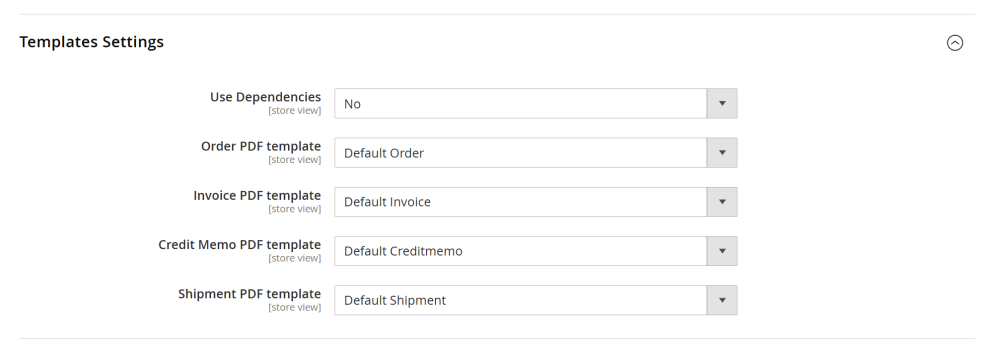
Use Dependencies – define how templates are assigned:
-
Yes – several PDF templates can be assigned to each document type dynamically based on Customer Group and Shipping Method conditions.
-
No – a single default template is selected for each document type (Order PDF, Invoice PDF, Credit Memo PDF, Shipment PDF);
If Use Dependencies enabled:
For each document type (Order, Invoice, Credit Memo, Shipment), a rule grid is available with the following columns:
-
Customer Group – select the customer group for which the template should apply (e.g., General, Wholesale, Retailer).
-
Shipping Method – select the shipping method for which the template should apply.
-
PDF Template – select the template that will be used when the defined conditions are met.
-
Action – remove the dependency rule.
Use the Add button to create additional dependency rules.
The system checks rules and applies the matching template according to the defined Customer Group and Shipping Method combination.
If Use Dependencies disabled, the following options are available:
-
Order PDF template – select the default template used for order PDFs.
-
Invoice PDF template – select the default template used for invoice PDFs.
-
Credit Memo PDF template – select the default template used for credit memo PDFs.
-
Shipment PDF template – select the default template used for shipment PDFs.
Each document type uses the selected template regardless of customer group or shipping method.
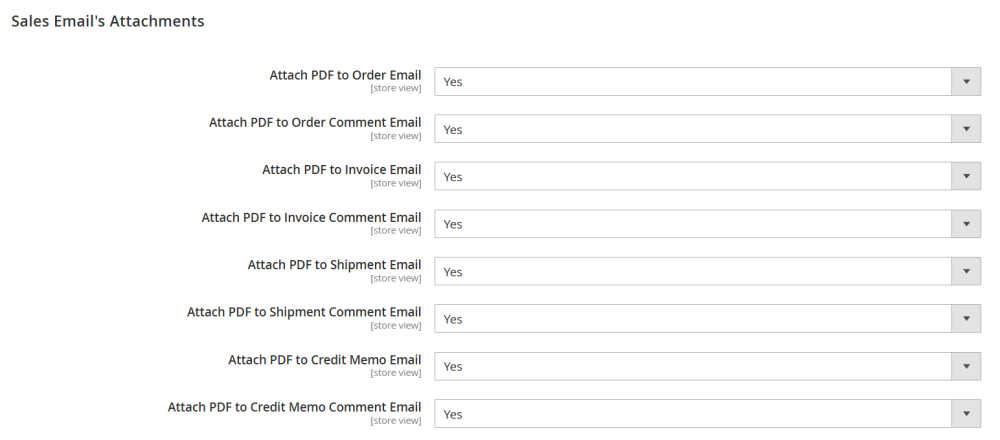
Sales Email's Attachments
The Sales Email’s Attachments section allows you to automatically attach generated PDF documents to sales related emails sent to customers.
You can enable or disable PDF attachments for each document type and email type separately:
-
Attach PDF to Order/Invoice/Shipment/Credit Memo Email – set to Yes to attach the PDF to the confirmation email sent to the customer.
-
Attach PDF to Order/Invoice/Shipment/Credit Memo Comment Email – Set to Yes to attach the PDF when a comment notification email is sent.
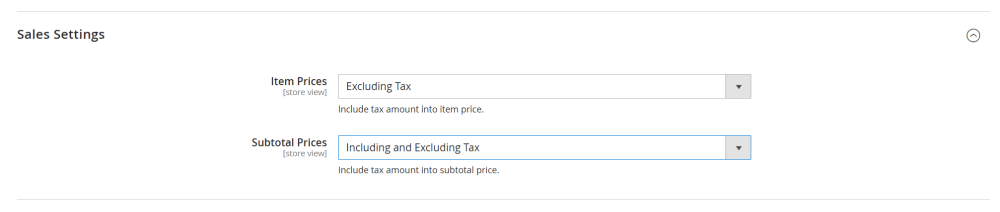
Sales Settings
The Sales Settings section controls how product prices and subtotals are displayed in generated PDF documents.
-
Item Prices – define how individual product prices are displayed in PDF documents:
-
Including Tax – item prices are displayed with tax included.
-
Excluding Tax – item prices are displayed without tax.
-
Including and Excluding Tax – both prices (with and without tax) are displayed.
This setting determines how the price of each order item appears in Order, Invoice, Shipment, and Credit Memo PDFs.
-
Subtotal Prices – define how the order subtotal is displayed in PDF documents:
-
Including Tax – subtotal is displayed with tax included.
-
Excluding Tax – subtotal is displayed without tax.
-
Including and Excluding Tax – both subtotal values (with and without tax) are displayed.
Use this setting to align PDF price presentation with your store’s tax display configuration and legal requirements.
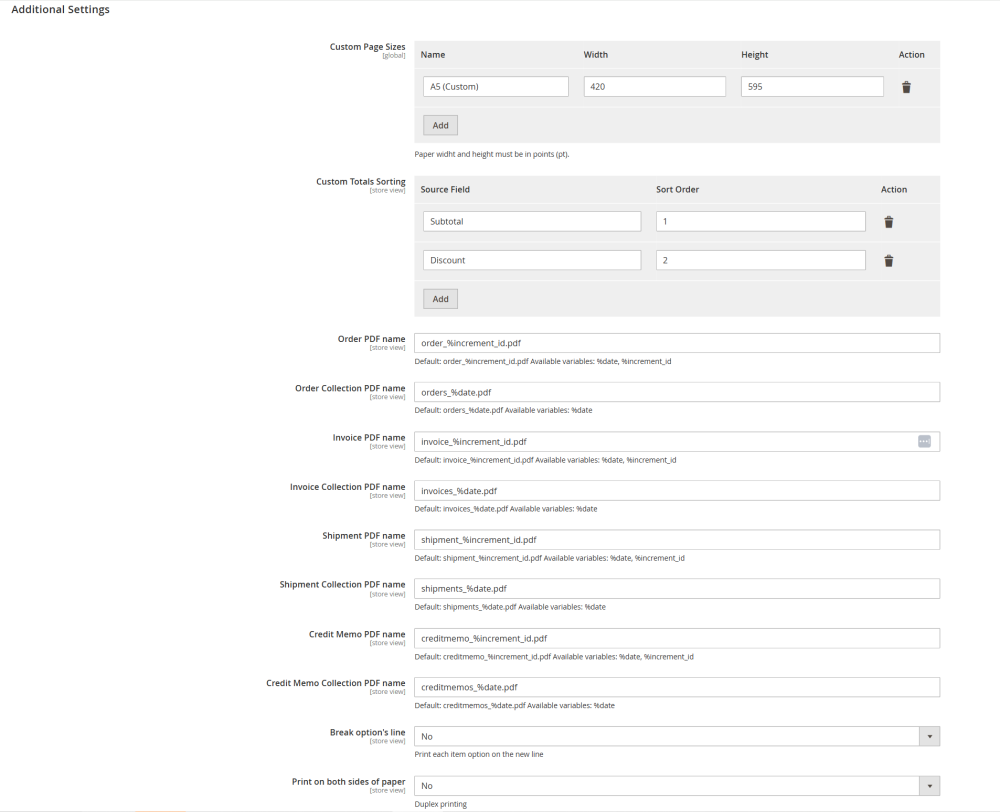
Additional Settings
The Additional Settings section allows you to configure advanced PDF behavior, including page sizes, totals sorting, file naming conventions, and printing options.
-
Custom Page Size – manage custom paper formats for PDF documents;
-
Name – enter a title for the custom page size (e.g., A5 Custom).
-
Width – define the page width.
-
Height – define the page height.
Custom page sizes can later be selected in template settings when configuring page layout.
| Note: Paper width and height must be specified in points (pt). |
-
Custom Totals Sorting – define the display order of totals in PDF documents.
-
Source Field – define the totals field (e.g., Subtotal, Discount, Shipping, Tax, Grand Total).
-
Sort Order – define the display position. Lower numbers are displayed first.
-
Order PDF Name – define how generated PDF files are named.
-
Available placeholders:
-
%date – current date
-
%increment_id – document increment ID (order, invoice, shipment, credit memo number)
-
Order Collection PDF Name – define the file name when multiple orders are exported at once.
-
Available placeholders:
-
%date – current date
-
The same way can be configured Invoice/Shipment/Credit memo PDF Name and Invoice/Shipment/Credit memo Collection PDF Name
-
Break Option’s Line – define how product options are displayed in PDF documents:
-
No – product options are displayed inline.
-
Yes – each product option is printed on a new line.
This setting affects how configurable product options and custom options appear in the items table.
-
Print on Both Sides of Paper – enable duplex printing support:
-
No – standard single-sided printing
-
Yes – optimized layout for double-sided printing.
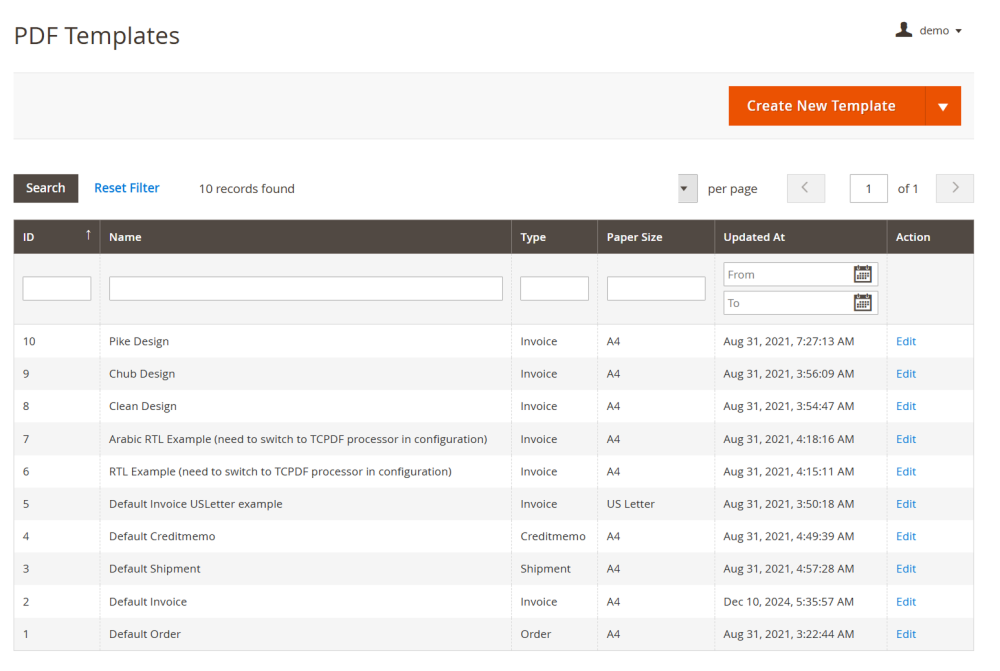
Managing PDF Templates
To edit and manage PDF templates go to Sales > Operations > PDF Templates
On the PDF Templates page, you will see a table containing all created templates with the following columns:
-
ID – a unique identifier automatically assigned to the template by the system;
-
Name – the template name defined by admin during creation;
-
Type – the sales document type the template is associated with (Order, Invoice, Shipment, or Credit Memo);
-
Paper Size – the selected paper format for the template;
-
Updated At – the date and time of the most recent modification;
-
Action – an Edit link that allows you to open and modify the selected template.
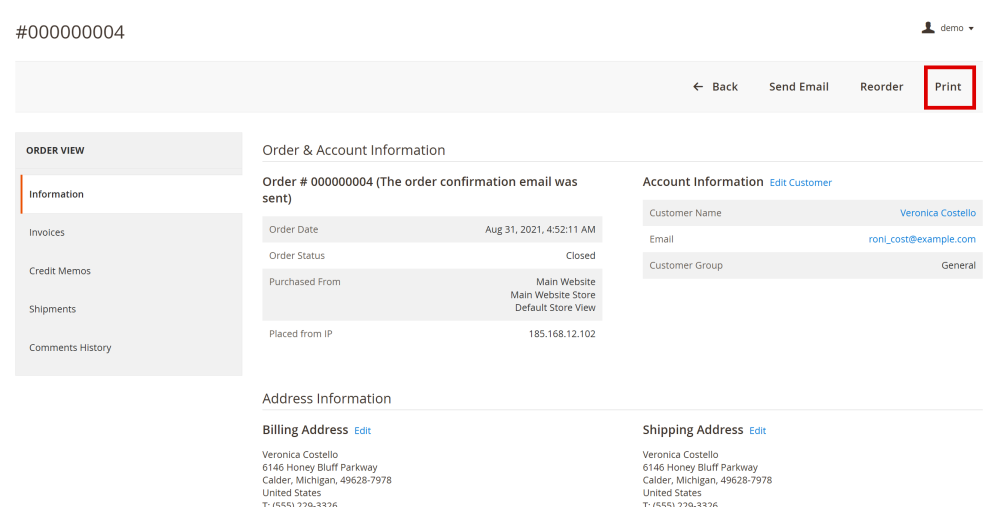
Download PDF Templates
On Backend
Store admins can download the template directly from the backend. To download the template go to Sales and choose the required sales entity, for example Order, and open the required Order page.
In the top menu click the Print button.
The PDF file will be downloaded to your computer.
On Storefront
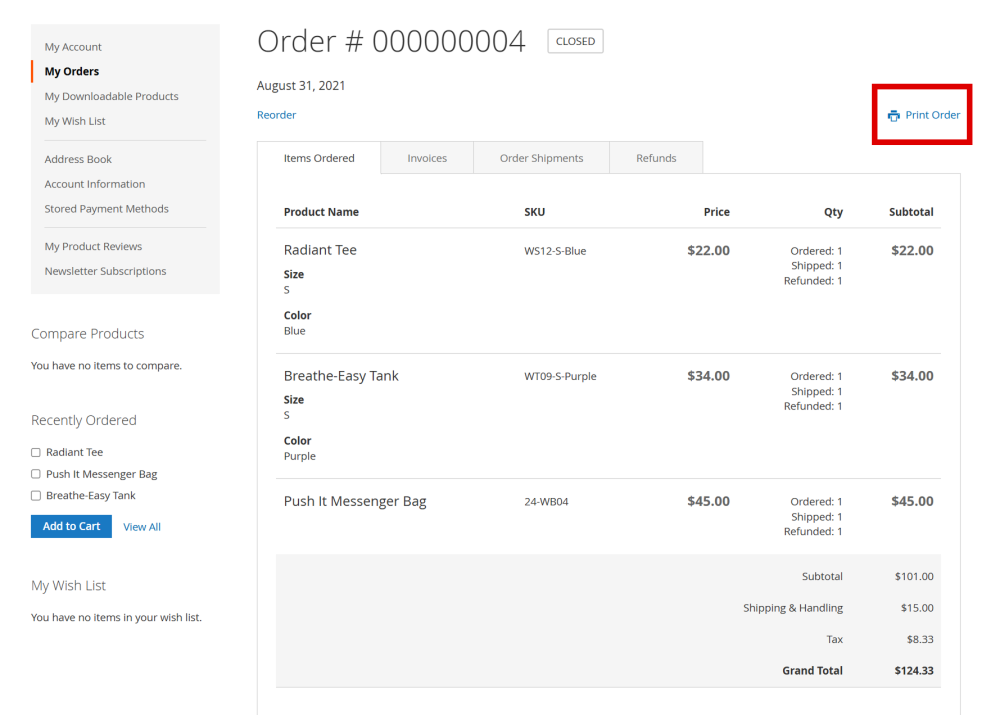
Customers can download PDF documents directly from their accounts. Navigate to the My Account > My Orders and select the required order.
To download a document, navigate to My Account > My Orders and select the required order.
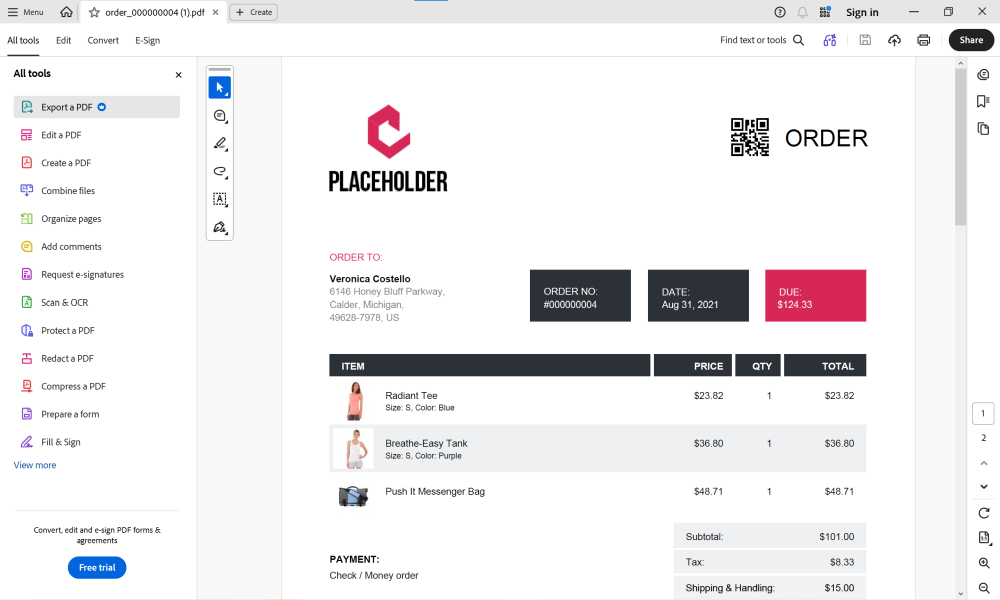
On the Order page, click Print Order to generate and download the Order PDF document to your computer.
If enabled in the configuration, customers can also download other types of sales documents. For example, to print an Invoice PDF, go to My Account > My Orders, select the required order, open the Invoices tab, and click Print Invoice.
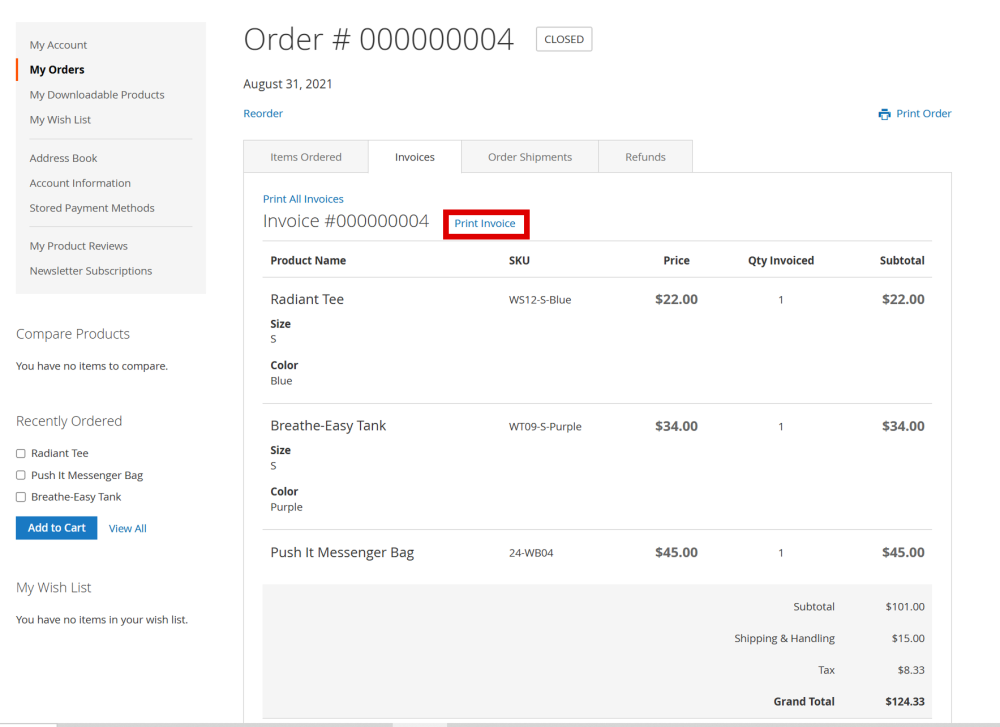
The selected PDF document will then be automatically downloaded to the customer’s computer.
