User Manual - Recent Sales Notification
- Installing the Magento 2 Recent Sales Notification extension
- Set up cron
- Uninstalling the Magento 2 Recent Sales Notification extension
- Extension Compatibility
- Introducing the Magento 2 Recent Sales Notification extension
- Using the Magento 2 Recent Sales Notification extension
Installing the Magento 2 Recent Sales Notification extension
Command Line Installation
- Backup your web directory and store database
- Download the Recent Sales Notification installation package
- Upload contents of the Recent Sales Notification installation package to your store root directory
- In SSH console of your server navigate to your store root folder:
cd path_to_the_store_root_folder |
run the following command: :
php bin/magento module:enable Aheadworks_RecentSalesNotification |
then:
php bin/magento setup:upgrade |
after:
php bin/magento setup:static-content:deploy -f |
5. Flush store cache; log out from the backend and log in again
|
Make sure the installation is done from the FTP administrator account. Otherwise, set 775 permissions to the store root directory after the extension is deployed. |
Composer Installation
If you are installing an extension from Aheadworks for the first time, you need to add our composer repository to your Magento store:
1. Login to your ssh console and navigate to your store folder:
cd path_to_the_store_root_folder |
Run the following command:
composer config repositories.aheadworks composer https://dist.aheadworks.com/ |
After the command was executed successfully, you can use the composer to install the extension.
To install the extension:
2. Login to your ssh console and navigate to your store folder:
cd path_to_the_store_root_folder |
3. Run the following command to install the latest version of the extension:
composer require aheadworks/module-recent-sales-notification |
if you need to install a specific version, run this command:
composer require aheadworks/module-recent-sales-notification:<version> |
|
Specify the version of the extension in <version> |
When prompted, enter Public Key (Username) and Private Key (Password):

Both Public Key (Username) and Private Key (Password) can be found in My Projects and Licenses in your personal account on our site:
 |
To upgrade the extension:
To update or upgrade an extension:
Download the updated extension file. Take note of the module-name and version. Export the contents to your Magento root.
If a composer package exists for the extension, run one of the following.
Update per module name:
composer update aheadworks/module-recent-sales-notification |
Updater per version:
composer require aheadworks/module-recent-sales-notification:<version> |
Run the following commands to upgrade, deploy, and clean the cache.
php bin/magento setup:upgrade --keep-generated |
Set up cron
If you have already configured cron jobs for your Magento installation then you can skip this step. Read the following instructions on setting cron job for your Magento store: Magento user guide.
Generally, it would be enough to run in SSH console of your server:
crontab -e |
And insert the following line:
*/3 * * * * php -c <ini-file-path> <your Magento install dir>/bin/magento cron:run |
Remember to confirm the Save request when exiting the installation.
Uninstalling the Magento 2 Recent Sales Notification extension
Since Magento introduced declarative Database you need to be very carefull when uninstalling or disabling the module.
|
NOTE: Please be very careful when uninstalling/disabling this module. This module uses a declarative DB scheme. Once the module is uninstalled the DB tables will be lost. |
Manual Removal
1. Disable the module by executing the following commands:
php bin/magento module:disable Aheadworks_RecentSalesNotification |
2. Remove the extension files from the following folder:
app/code/Aheadworks/RecentSalesNotification |
Automatic Removal (via Composer)
1. Disable the module by executing the following commands:
php bin/magento module:uninstall Aheadworks_RecentSalesNotification |
Extension Compatibility
| Module Version | Magento Version |
| As of version 1.0.0 | 2.4.6 - 2.4.8 |
The PHP version depends on your current Magento version. Please, refer to your Magento version release notes.
Introducing the Magento 2 Recent Sales Notification extension
Extension Overview
The Recent Sales Notification extension displays smart storefront notifications that reflect real purchase activity and product availability. It offers three distinct notification types, each managed through its own configuration section for precise control.
By presenting timely purchase information and low-stock indicators, the extension strengthens customer confidence, highlights product popularity, and encourages quicker buying decisions
Key Features
- Three notification types with independent configuration settings
- Real-time “Someone just bought” purchase notifications
- Notifications showing when a product was last bought
- Low-stock alert notifications to create urgency
- Control over notification visibility, display duration, and priority
- Mobile visibility controls per notification type
Using the Magento 2 Recent Sales Notification extension
Extension Configuration
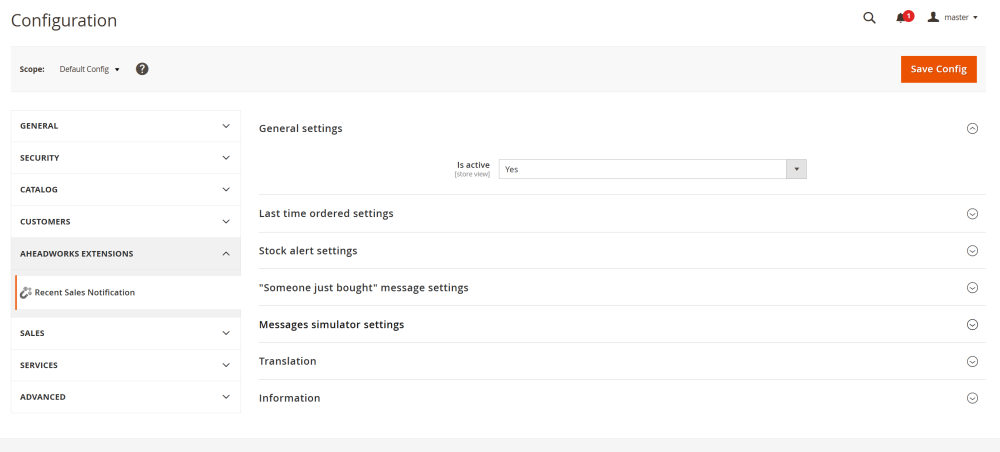
To enable the extension, go to Stores > Configuration > AHEADWORKS EXTENSIONS > Recent Sales Notification.
General Settings
In the General Settings section configure the following options:
- Is Active – set this option to Yes to enable the extension;
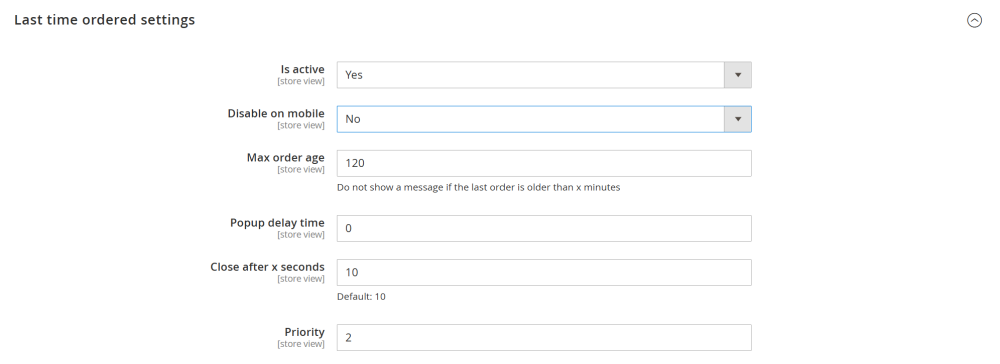
Last Time Ordered Settings
This notification shows when a specific product was last purchased, helping reinforce product demand and customer confidence.
- Is active – set this option to Yes to enable the this notification;
- Disable on mobile – control whether this notification appears on mobile devices;
- Max order age – define how recent (in minutes) the last order must be to display the message. If the item was last ordered more than the specified number of minutes ago, the notification will not appear;
- Popup delay time – define (in seconds) how long the system waits before showing the notification after the page loads. Set to 0 to show the popup immediately;
- Close after X seconds – define how long the notification remains visible before closing automatically. 10 seconds is a default value;
- Priority – set the display priority of this notification relative to others. Only the notifications with higher priority will be shown when multiple notifications are triggered.
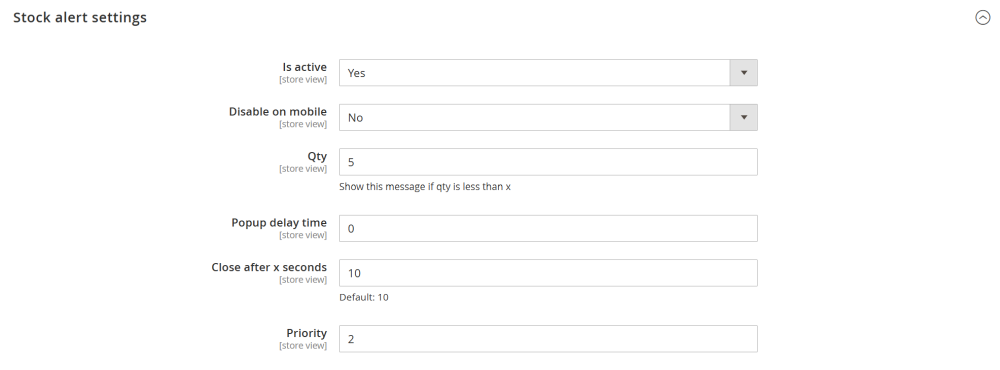
Stock Alert Settings
This notification creates urgency by informing customers when product stock is running low.
- Is active – set this option to Yes to enable the this notification;
- Disable on mobile – control whether this notification appears on mobile devices;
- Qty – define the stock threshold at which the notification triggered. The message is shown when item quantity is less than the specified value;
- Popup delay time – define (in seconds) how long the system waits before showing the notification after the page loads. Set to 0 to show the popup immediately;
- Close after X seconds – define how long the notification remains visible before closing automatically. 10 seconds is a default value;
- Priority – set the display priority of this notification relative to others. Only the notifications with higher priority will be shown when multiple notifications are triggered.
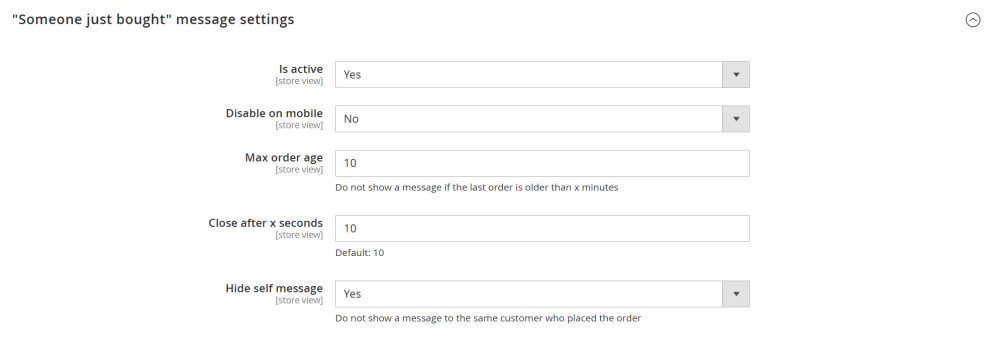
"Someone just bought" Message Settings
This notification displays real-time purchase activity to build social proof and customer trust.
- Is active – set this option to Yes to enable the this notification;
- Disable on mobile – control whether this notification appears on mobile devices;
- Max order age – define how recent (in minutes) the last order must be to display the message. If the item was last ordered more than the specified number of minutes ago, the notification will not appear;
- Close after X seconds – define how long the notification remains visible before closing automatically. 10 seconds is a default value;
- Hide self message – prevents customers from seeing notifications about their own purchases.
Messages Simulator Settings
The Message Simulator is a technical tool that controls how notification messages are processed internally. It is primarily intended for testing and development purposes.
When enabled, the simulator imitates Magento’s internal message queue behavior. Instead of displaying notifications immediately, messages are queued and processed at a fixed time interval.
This helps developers and store admins:
- Test notification logic and display behavior
- Control message processing frequency
- Prevent system overload during development or testing
- Verify notification order and priority handling
The message simulator setting has the following options:
- Is active – set this option to Yes to enable the simulator. When enabled, notifications are not sent instantly but are handled according to the defined interval.
- Time Interval – define how often (in seconds) queued notification messages are processed. This setting controls the delay between message processing cycles and helps regulate notification flow during testing.

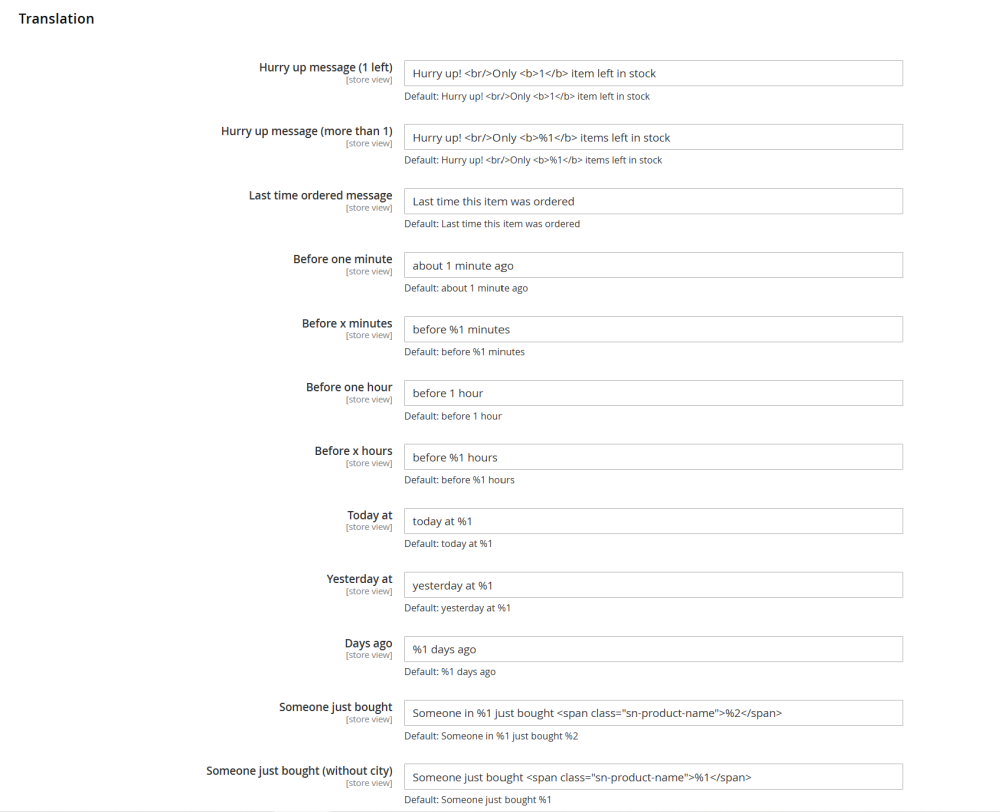
Translation
This section allows you to customize and translate all notification texts displayed on the storefront.
Translation Rules
- HTML is allowed – you can use basic HTML tags such as <br>, <span>, or <b> for formatting.
- Variables must not be removed – placeholders like %1, %2 are dynamic variables and are automatically replaced with real data. Removing or modifying these variables may cause incorrect message rendering.