CSS Margin vs. Padding: What's The Difference And How To Use?
Categorized as : Ecommerce and Shopify Apps
A lot of time has passed since those days when you needed coding skills to create and maintain an online store. Today, to build and grow your business, you need a desire and powerful tools. Here page builders play an important role, as they give a chance to attain appealing design without using a single line of code.
Although responsive widgets are flexible enough and allow users to change element’s height or width, you may still need some CSS techniques to achieve an ideal result. Buildify Landing Page Builder allows users to add some advanced settings to the widget, including margin, padding, CSS ID, etc. But what do these features mean, and how can they improve a widget's appearance? Today we will talk about margin and padding properties in more detail.
CSS box model
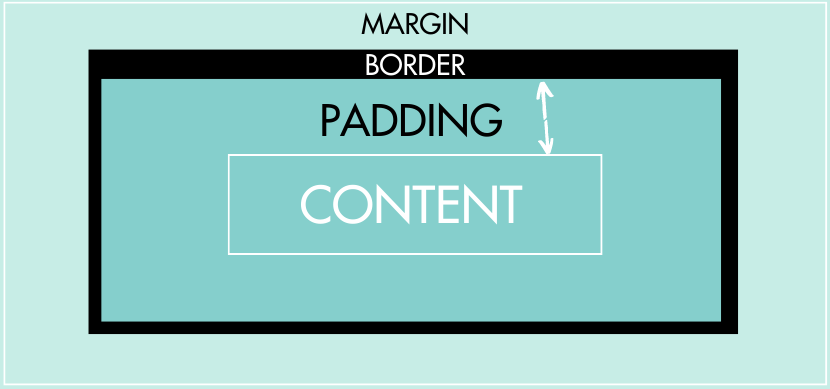
Margin and padding are the components of the CSS box model, a design specificity related to any HTML element. These boxes of multi-layered elements are combined to form a single layout of the web page.
In general, box model usually contains four components:
- Content is the core of the box. It’s around the content the other layers are built. Content can have different visualizations: it can be text, image, icon or something else.
- Padding is the space between content and border, which is the next component of the box.
- Border is a visible or invisible line around the edge of the box.
- Margin is the outer space around the box.
For better visibility, let’s look at the picture below, which gives a general presentation box model.
What’s the difference between margin and padding in CSS?
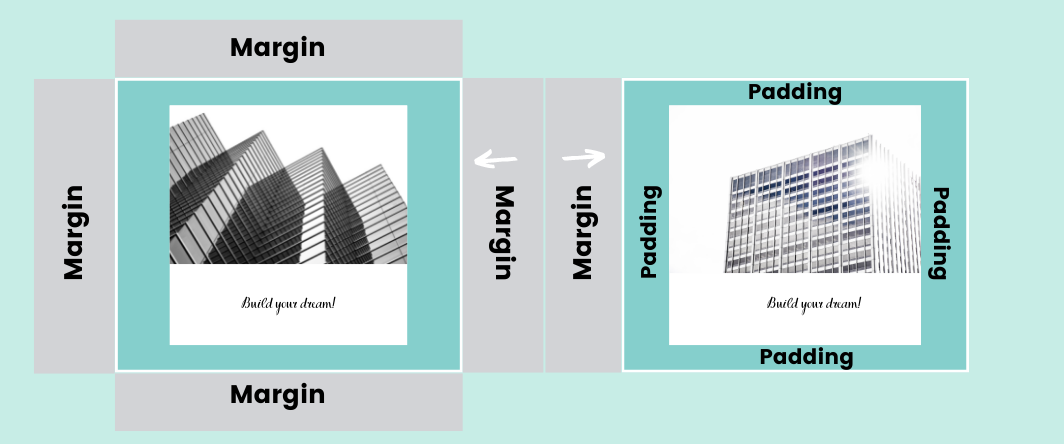
Some people confuse margin with padding, because both terms mean spacing and neighbor with border. However, they have principle differences and right term operation can save you much time.
Margin is an external element, which means it exists outside the box. It controls the spacing between different elements (boxes) and between the element (box) with the edge of the screen.
Padding, on the contrary, determines inside spacing, which can control how much the background color is visible around the content.
However, in some situations both elements suit to reach a wanted effect. Let’s look at the example below.
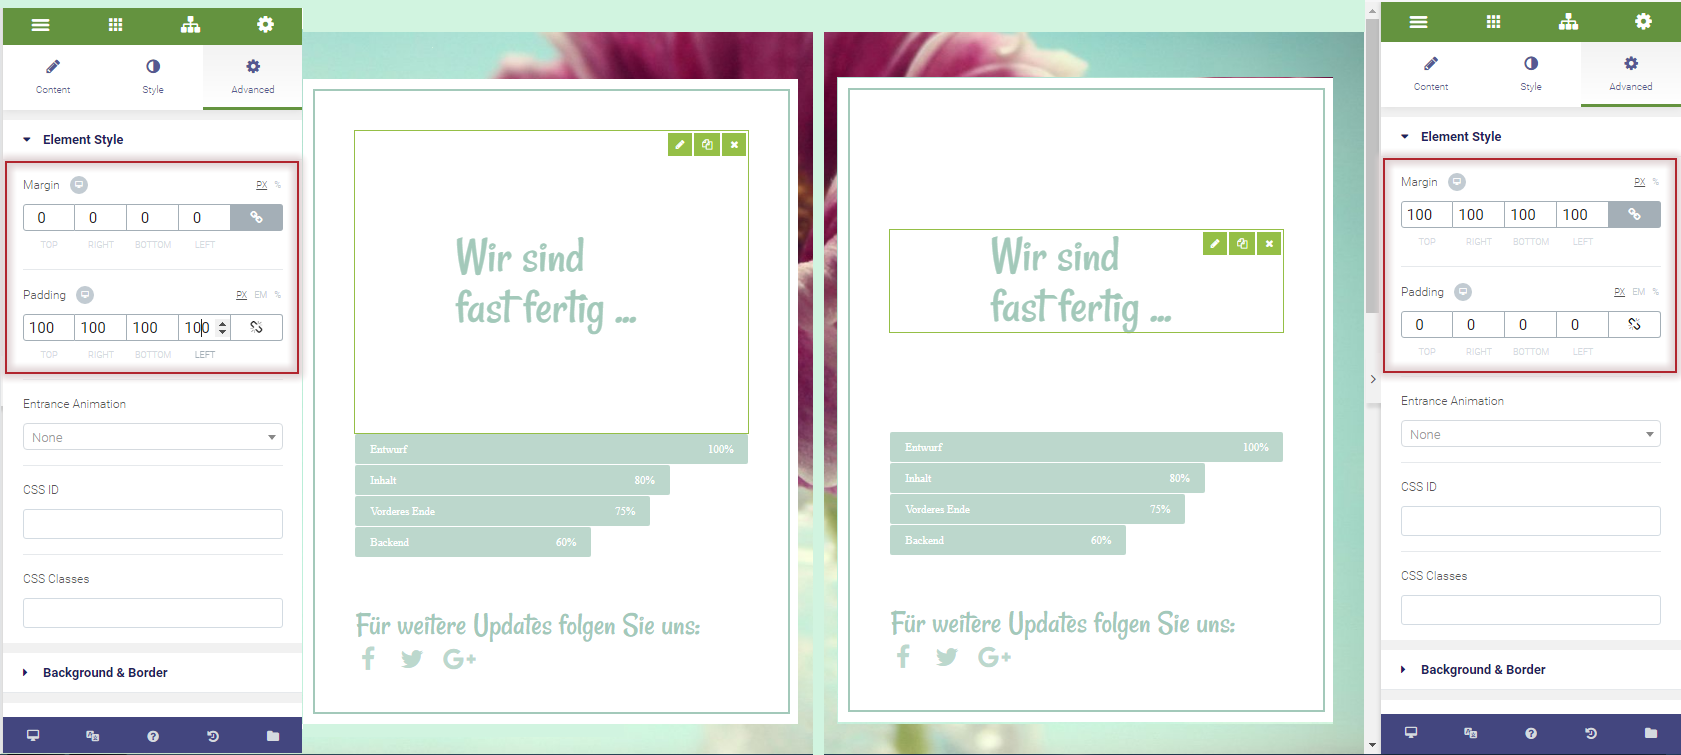
Here you can see how to increase the space between the header and the poll using margin or padding. In the left example, we set padding to 100 px for all sides, increasing the spacing inside the box structure.
The right example, on the contrary, shows the margin spacing increased to 100 px for all sides and padding set to 0. As you can see, the effect is identical, that’s why a lot of people confuse margin and padding terms.
Drive Traffic, Boost Sales with Magento 2 Blog Extension - Elevating Stores with 30% More Organic Traffic!
When to use margin?
There are three popular use cases, when CSS margin can be helpful to organize the page content and adjust the design.
1. Change element’s position on the page
To set the element right or left, up or down on the page, you can play with the margin. To reach the centered position on the page, make sure the width of the page is fixed and set margin value to Auto.

2. Add distance between two elements in the page
CSS margins are used to make the elements’ arrangement on the web page visually appealing by adding spacing between them. This way two images or an image and a text won’t densely adjoin each other, distracting the visitor's attention.

3. Overlap elements
The negative margin value helps to trespass an element upon another element space. In the example below you can see how one image overlaps the other with the help of margin, which creates a broken grid layout.

When to use padding?
CSS padding can also be useful to achieve certain effects. Here are the most widespread ones:
1. Increase space between content and its border
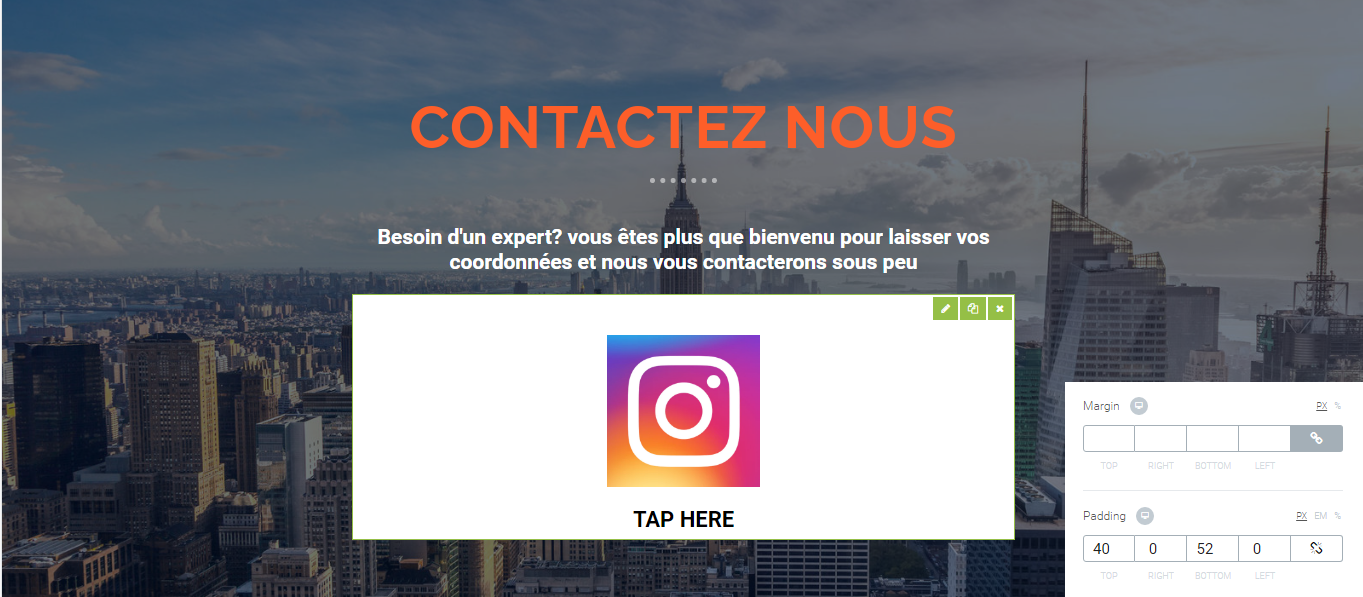
Padding gives an opportunity to control a breathing room around the element. Additional space for text on the button, for example, can improve its readability, as well as design in general.

2. Adjust the size of the element
Although padding doesn’t influence the content size, it can increase or decrease the white space around making it more visible and clickable. This case is especially popular when creating product cards and buttons.
How to edit margins and paddings?
There are two ways to edit margin or padding of the element: through code or by using a page builder.
To edit CSS margin or padding through code, open stylesheet and find the class of the element you want to change margin or padding for, edit the value and save. Sounds easy, but it can take time to find a necessary class and employ the right value, as there’s no editor you can simultaneously see the changes in.
Practice shows that the second way is more reliable. We recommend editing margin or padding of the element via Buildify Landing Page Builder. With it, you don’t need to search for the needed class or guess what value to set. All you need is to click the wanted element on the editor and check the result right there.
Let’s see how to enable and edit CSS values in Buildify in more detail.
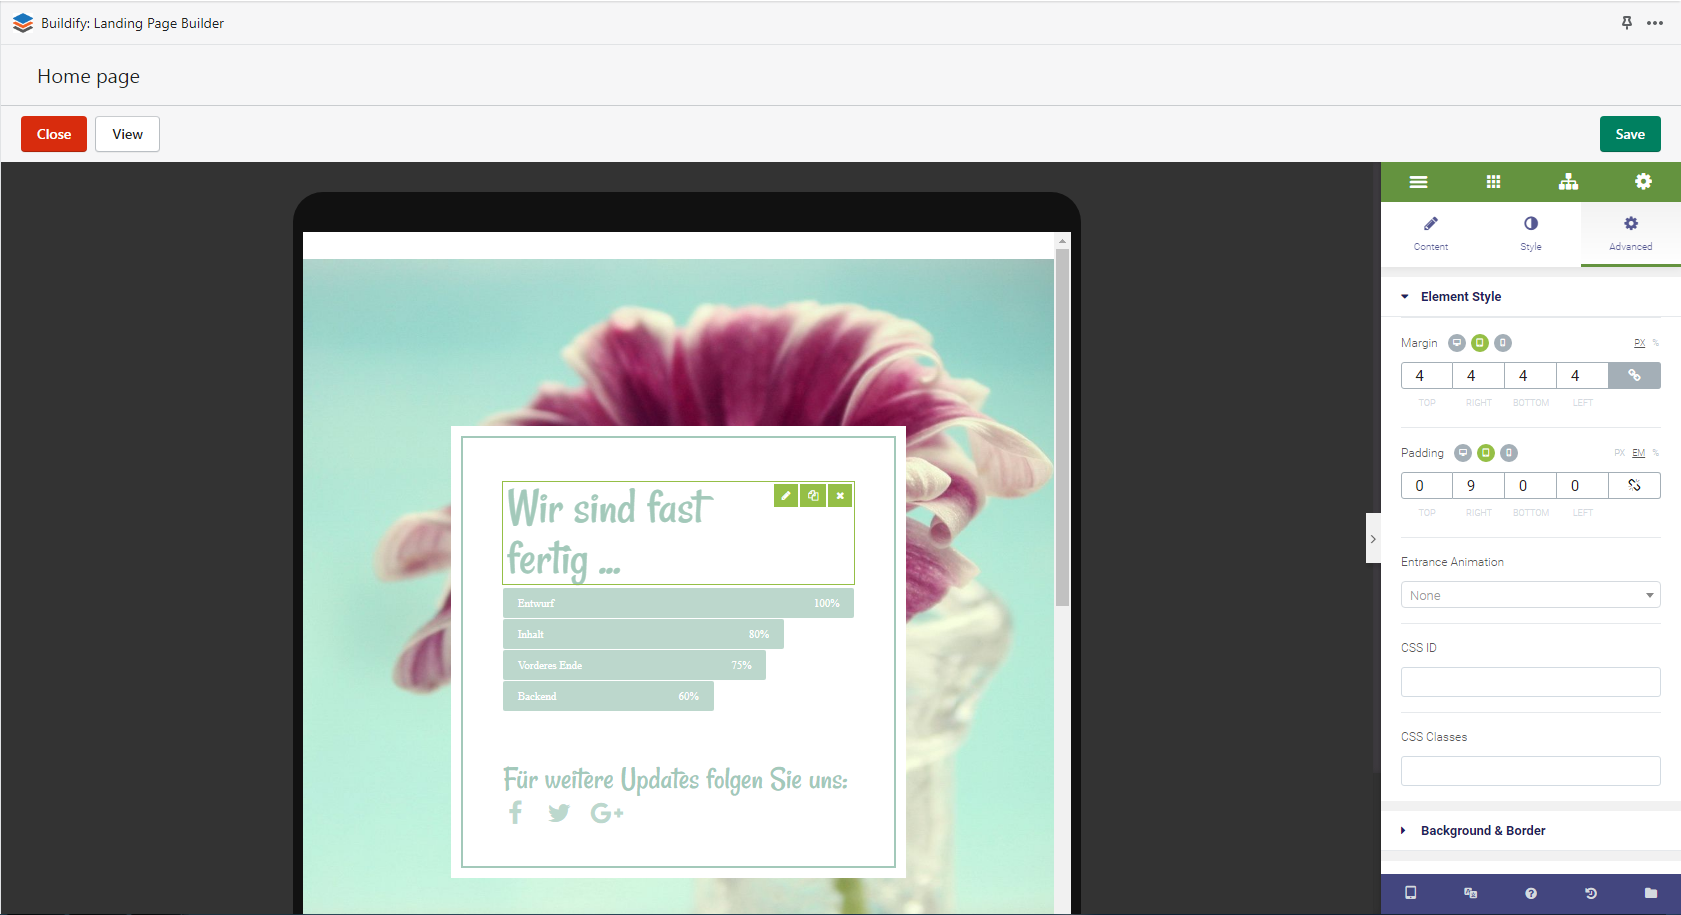
Click the element you want to edit and open Advanced settings > Element Style. Here you’ll see Margin, Padding values, Entrance Animation, CSS ID and CSS classes.
The Margin and Padding sections contain four columns related to each side: top, bottom, right and left. You can set different values for each or link them together to get similar values.
There you can also choose the measurement of the properties, which can be in px, em or %.
And finally, you can set different values for different devices by clicking the appropriate icons next to the property name, making your page completely responsive.
That’s it, preview the result and publish the page.
As we continuously improve to serve you better, here are the latest updates to Buildify:
- New Templates Added: We've expanded our library with 10+ new templates, giving you more creative options to customize your landing pages.
- Shopify Polaris v12 Integration: Buildify has successfully migrated to Polaris v12, adopting Shopify's latest admin design language. This update brings a modern and sleek look to your admin panel.
- Performance Enhancements: Our team has made various optimizations to the system to ensure smoother operations. These improvements are designed to enhance the user experience and provide better, more reliable service.
- UI Redesign: We've redesigned the app UI to make it more intuitive, helping you navigate and create with greater ease.
To stay updated, please check our changelog update release notes
Conclusion
Now, when you know the difference between margin and padding and their functionality, you can employ them while working on your website layout.
If you’re a beginner in coding or just want to save your time, try Buildify, an absolutely intuitive page builder with advanced features and drag-and-drop design.


